
My mother-in-law recently ditched her giant entertainment hutch that housed her small flat screen TV in favor of a larger, more modern flat screen that directly mounted to the wall. The problem with this was that the outlet and all her cords were no longer hidden by the hutch and were now a visible eyesore. After much discussion on how we could fix this problem, a DIY floating shelf seemed like the best solution to hide the outlet and cords and give her electronic accessories a place to sit.
Since I’m a newbie to the floating shelf game, I knew I needed to do a little research. Luckily, I found this video and instructions over on Shanty-2-Chic’s website which gives the basics on how to build one. The good news is this project doesn’t require a lot of lumber, just four boards! I had to modify the plans because of the electrical outlet and used a few different dimensions of lumber but the overall plans are still the same. I’ll explain more once we get into the build steps so let’s get into it.
Materials:
- 2×4@10′ (construction-grade pine)
- 2-1×12@6′ (whitewood or pine)
- 1-1×6@6′ (whitewood or pine)
- 2 1/2″ pocket-hole screws
- 1 1/4″ pocket-hole screws
- 3 1/2″ wood screws
- Two 1″ wood screws (optional)
- Stain
Tools:
- Miter saw
- Drill
- Kreg Jig
- Jigsaw
- Sander
- Stud finder
- Level
Cut List:
- 1-2×4@40 1/2″
- 1-2×4@8 1/2″
- 5-2×4@9 3/4″
- 2-1×12@54 1/4″
- 1-1×6@55 3/4″
- 2-1×6@11 1/4″
Step One: Build the 2×4 Support
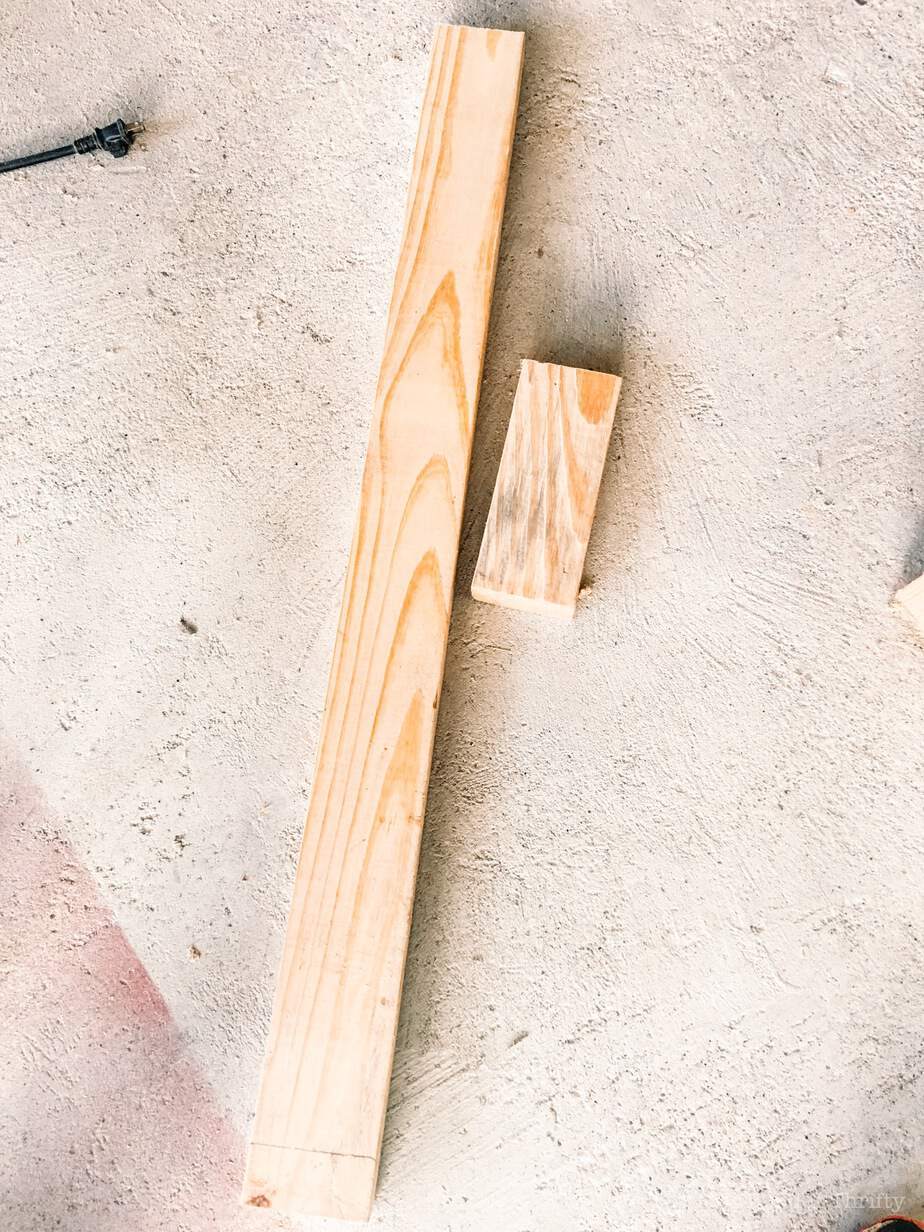
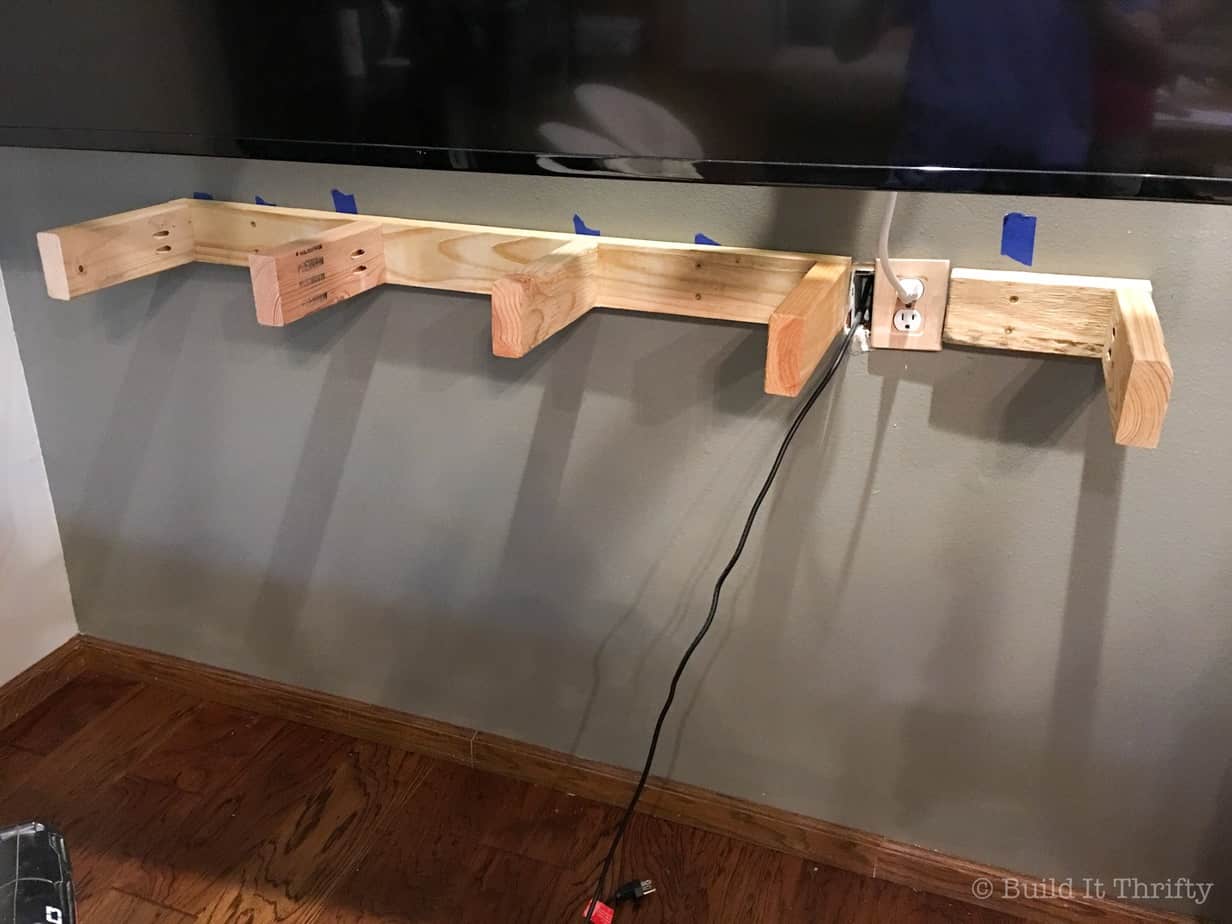
Cut all your 2×4 boards for the support frame. Because of the electrical outlet, there has to be two separate supports, a long and a short one. FYI-If you aren’t trying to cover an outlet then you don’t need to worry about this second small support just build one long support frame. However, this will alter the measurements for the box and you will have to adjust accordingly. That is the great thing about these floating shelves though, they can be built custom to the space you are working with.

With your Kreg Jig set to 1 1/2″ depth, drill pocket holes on each end of the five 9 3/4″ boards.

Now, attach the four of those boards to your long (40 1/2″) 2×4 using 2 1/2″ pocket-hole screws and wood glue. There should be 11 1/2″ between each one. Attach the remaining one to the end of the short (8 1/2″) 2×4. Here is a pic of what it should look like and shows you what I meant earlier about the long and short support. This will make more sense in step four when we attach it to the wall. Again, if you aren’t using the short support just disregard this.
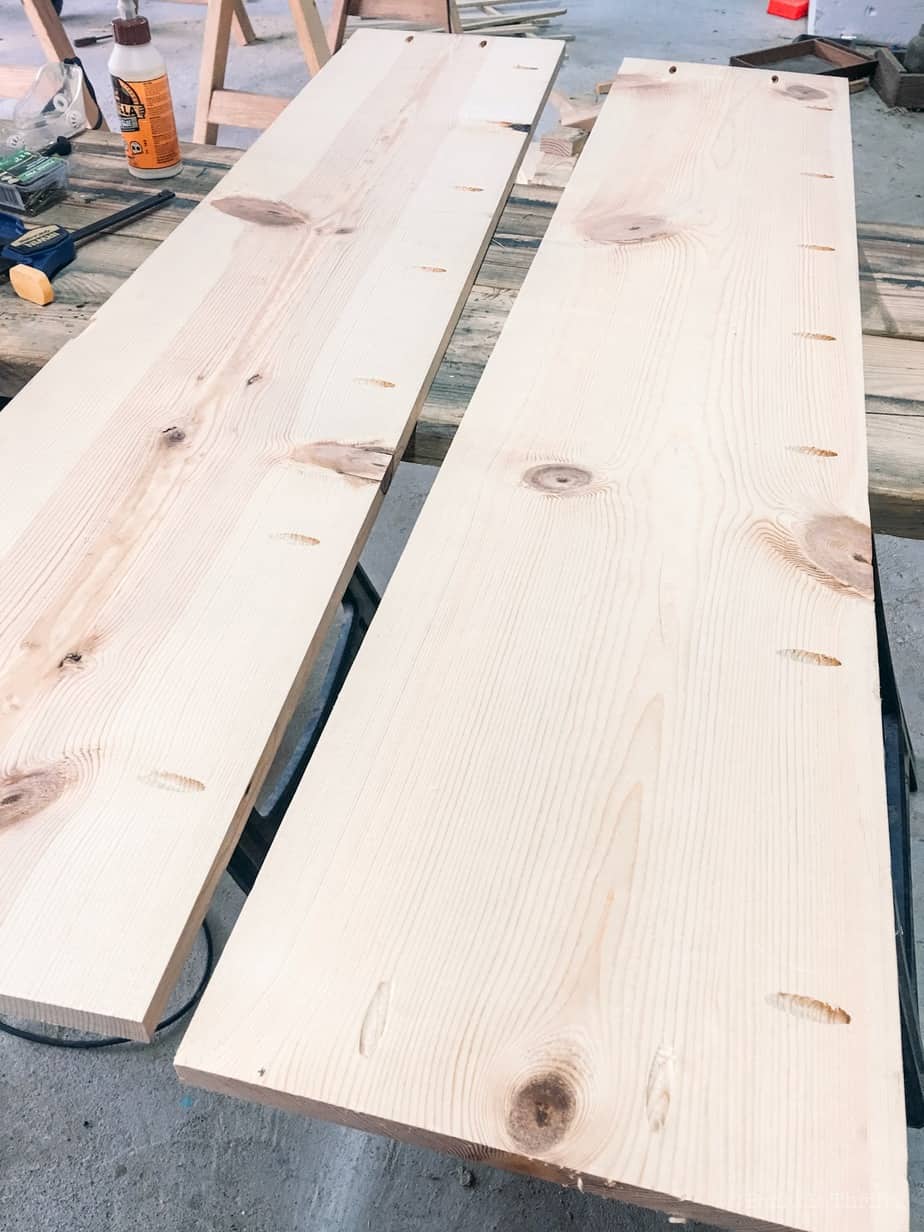
Step Two: Build the Box
Cut both of the 1x12s. Adjust the Kreg Jig and drill bit to the 3/4″ depth setting. Drill pocket holes all the way around the 1×12. Here is a pic that shows where I put the pocket holes.
Next, cut your three 1×6 boards and drill two pocket holes at one end of the two short pieces.
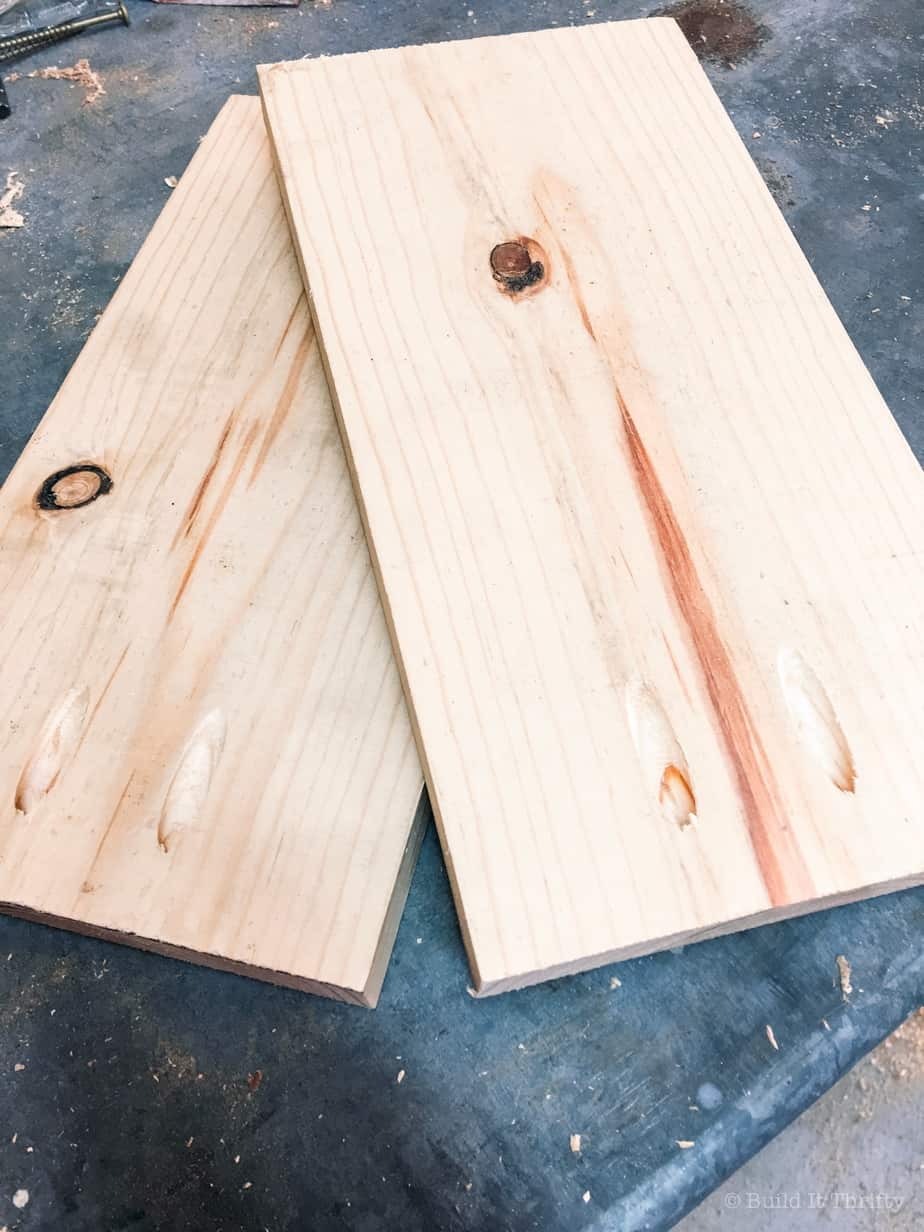
Attach the two short 1×6 boards to the 1×12 using 1 1/4″ pocket-hole screws and wood glue.

Now, attach the long 1×6 board to the 1×12 using 1 1/4″ pocket-hole screws and wood glue.

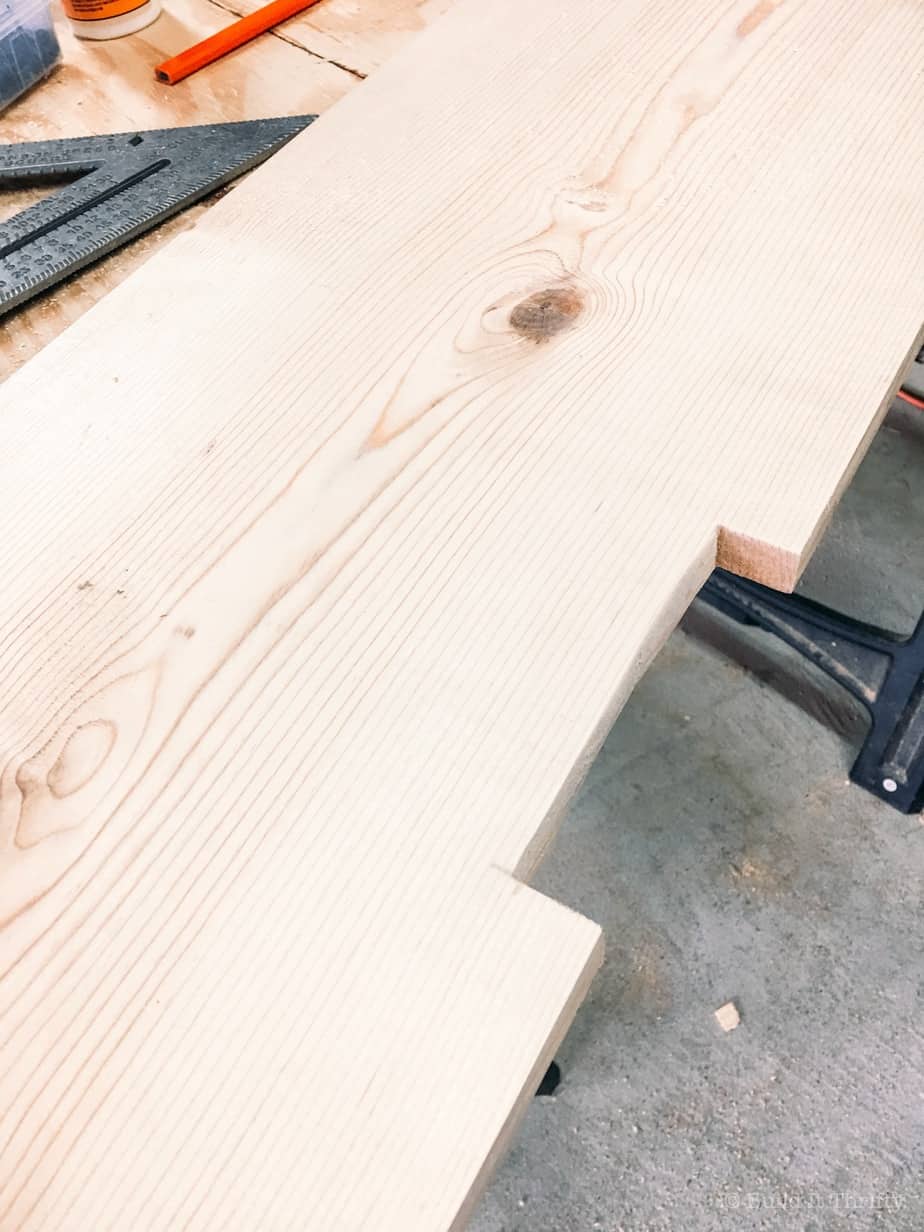
Before I could attach the second 1×12, I had to create a notch in the board using a jigsaw. I had previously measured the size it needed to be to accommodate the electrical outlet and give room for the cords.
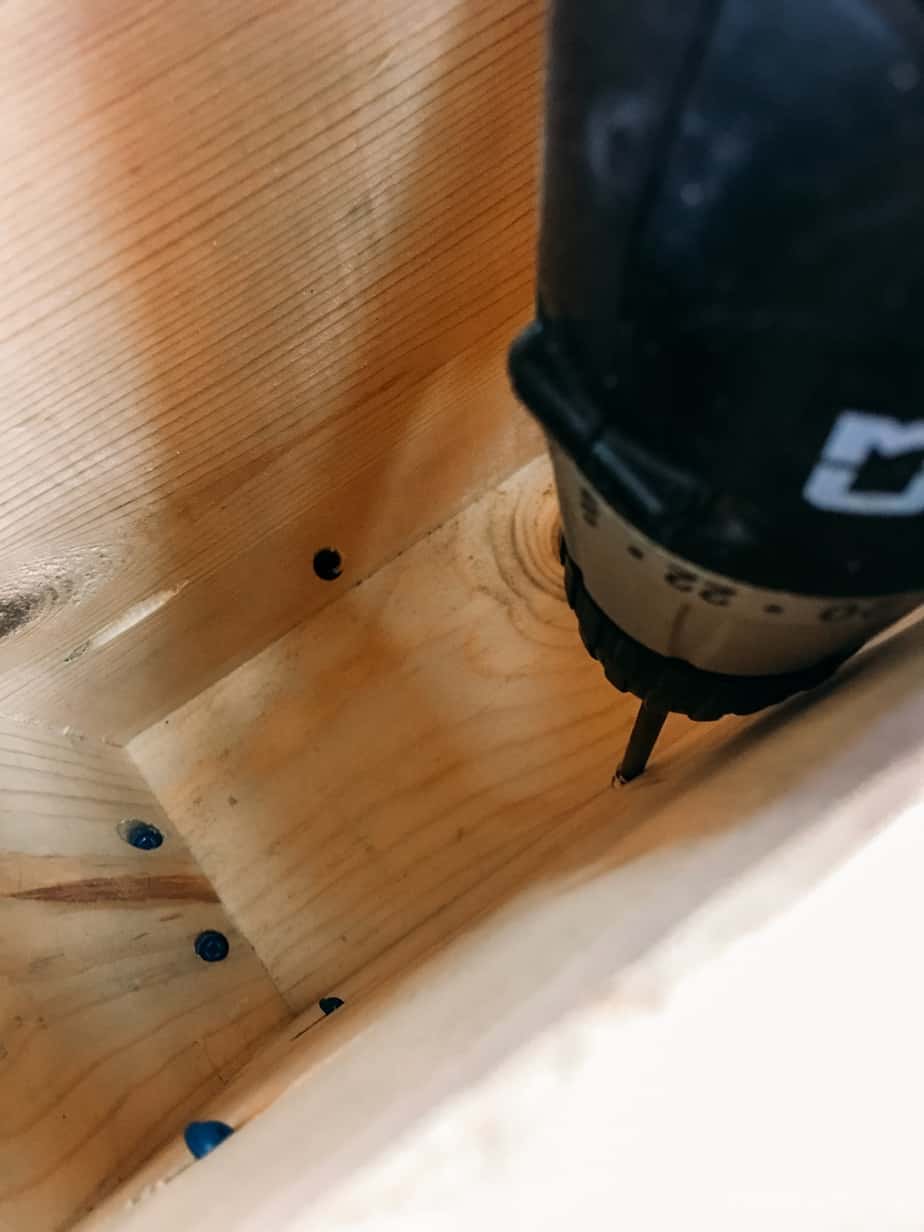
Now it’s time to attach the other 1×12 to complete the box. This is where it gets a little tricky and where having tiny hands is an asset. The box is pretty narrow so it’s a little difficult to drill in the screws. I had to lay it on it’s side a few times to find the best position for the drill.
Step Three: Sand and Stain
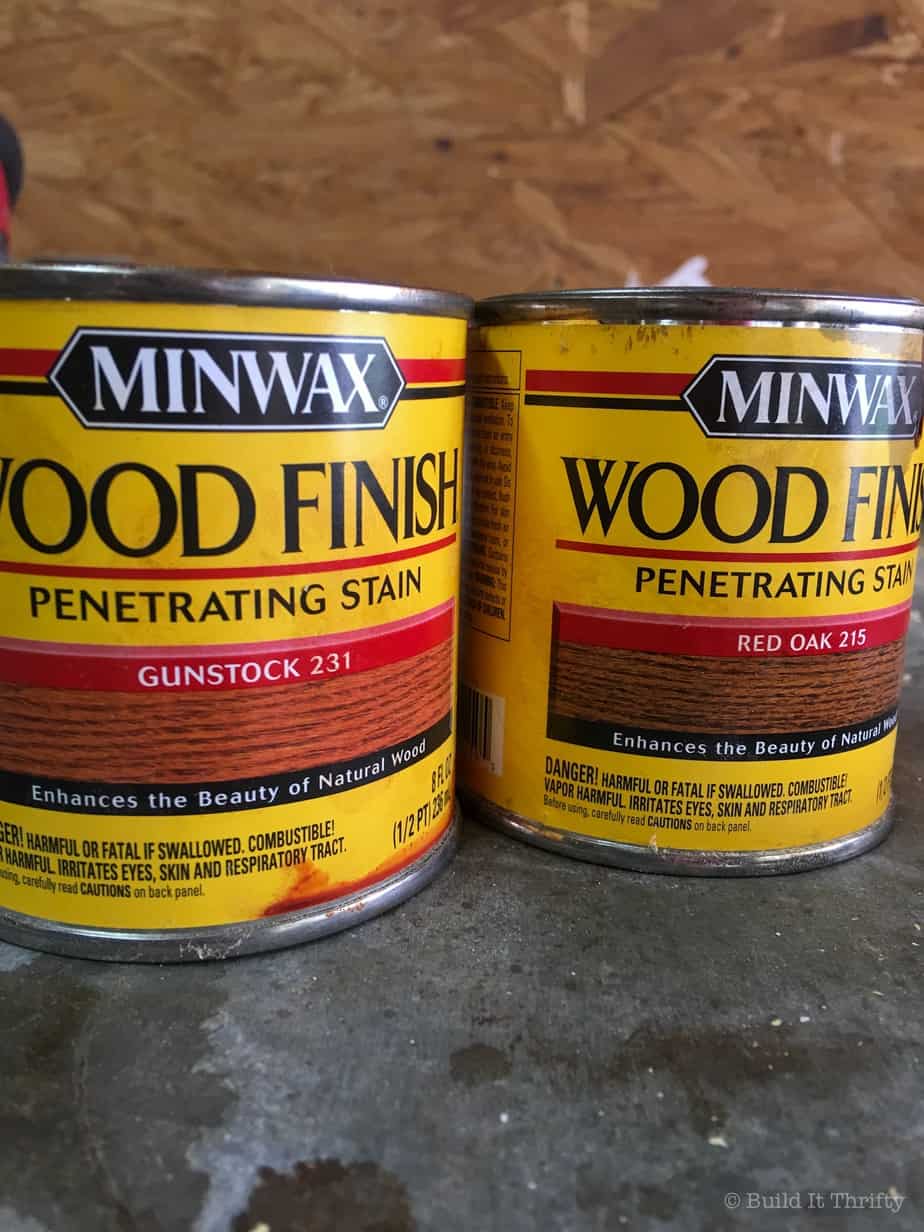
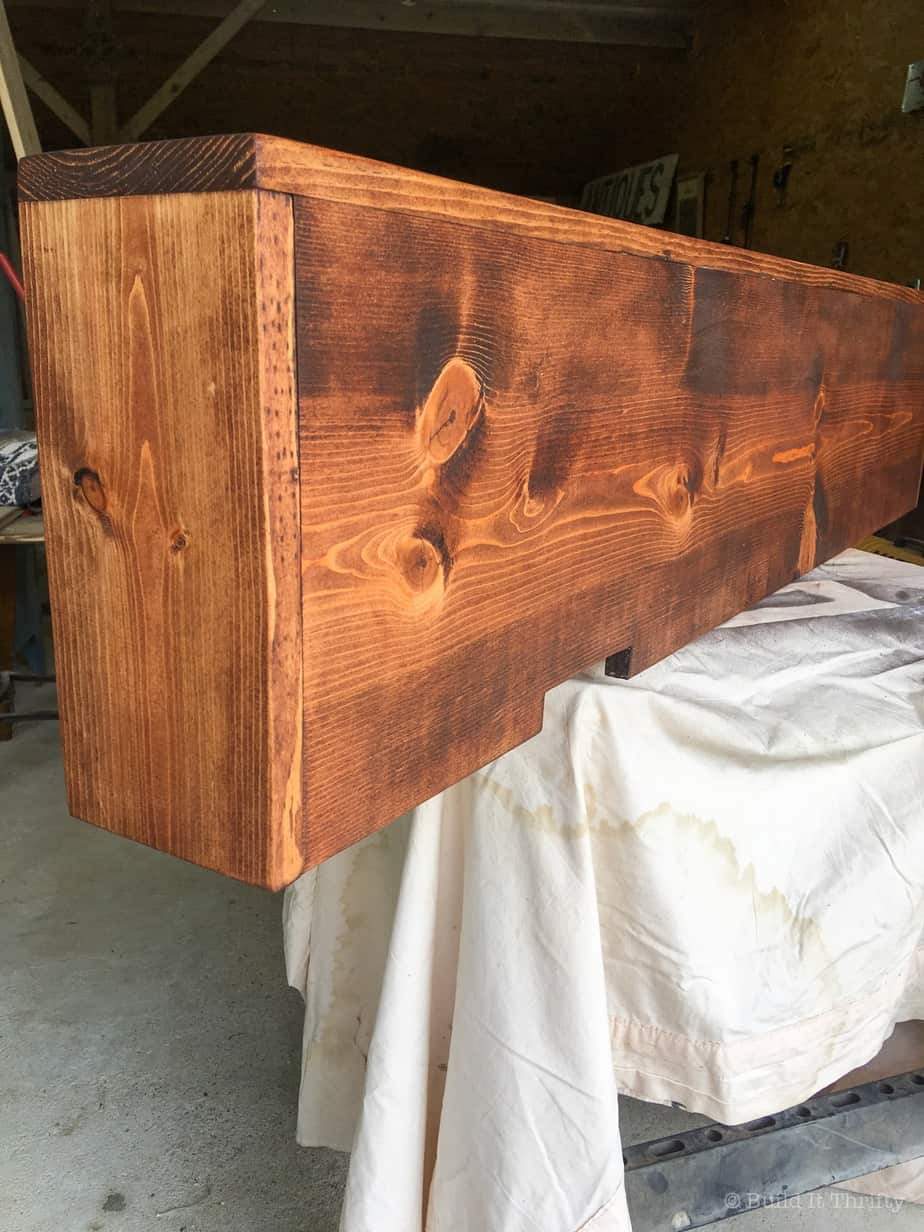
Now that our shelf box is built, sand everything with an orbital sander with 120-grit sandpaper to get it ready for stain and round off the sharp edges. Here is a pic of the stain I used. My mom-in-law wanted it to match the media console she had already purchased. After testing it out on some scrap wood, I went with a mixture of Red Oak and Gunstock. First, I stained with the Red Oak and then came back over it with the Gunstock to give the color more warmth.
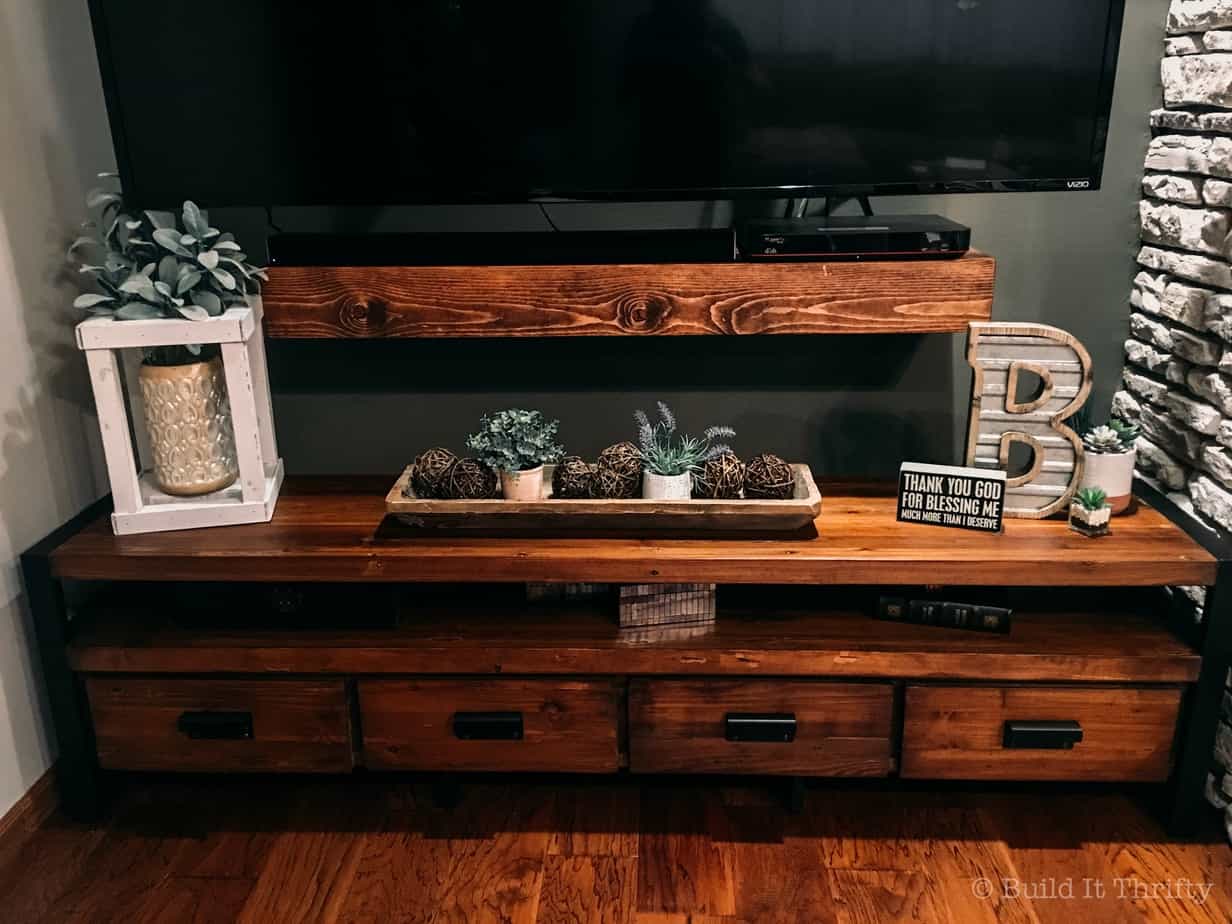
Here it is complete! The mixture of the stain turned out to be a beautiful color and was almost a perfect match with the media console.
Step Four: Hang the Shelf
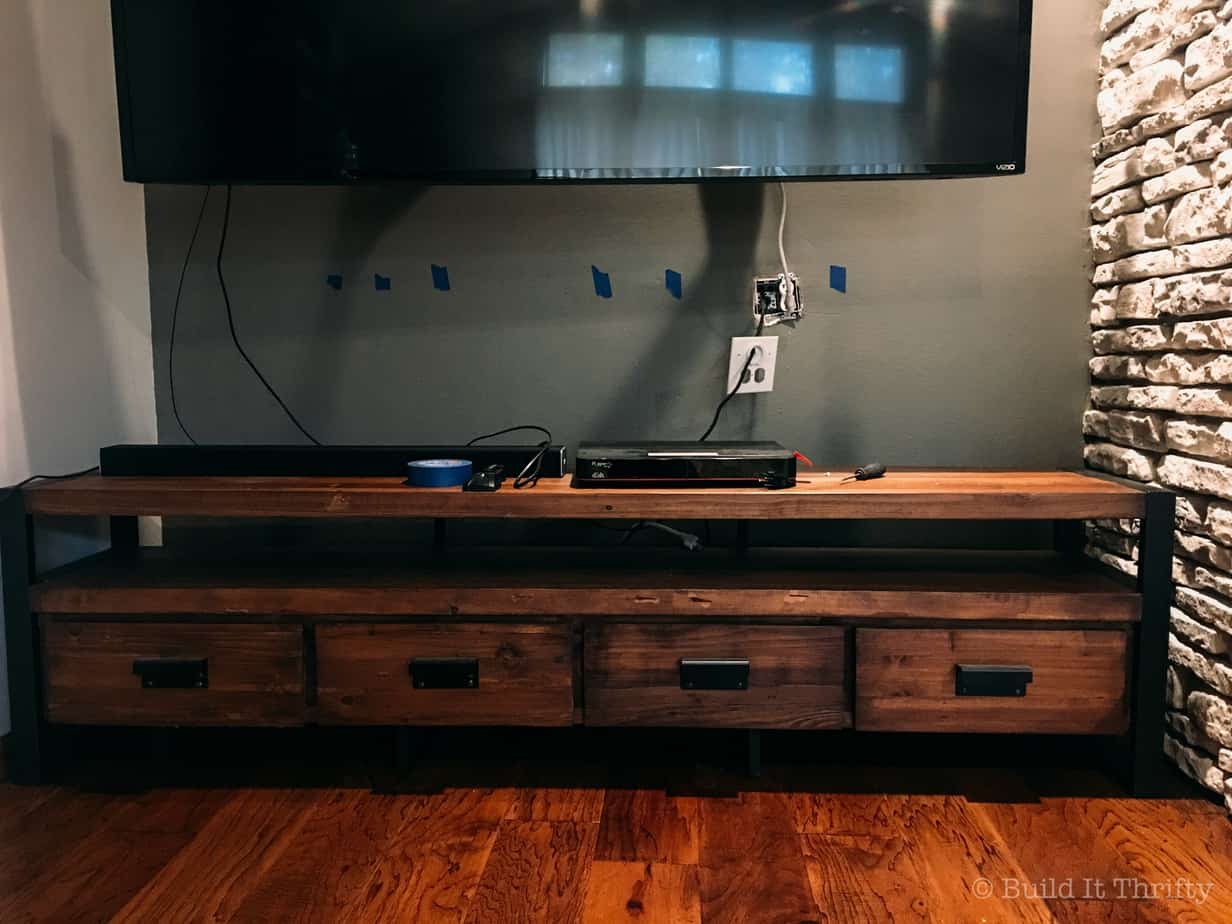
Before you can hang your floating shelf, you need to find out where your studs are with a stud finder. See what I mean about that pesky outlet? Well, that jerk is about to disappear. I started by attaching the short support to the right of the outlet by drilling two 3 1/2″ wood screws into the stud. Then, I repeated this for the larger support. Another set of hands will come in handy here, no pun intended there. 😉 I had my mother-in-law help with this step. Check everything with a level afterwards. This sucker isn’t going anywhere anytime soon!
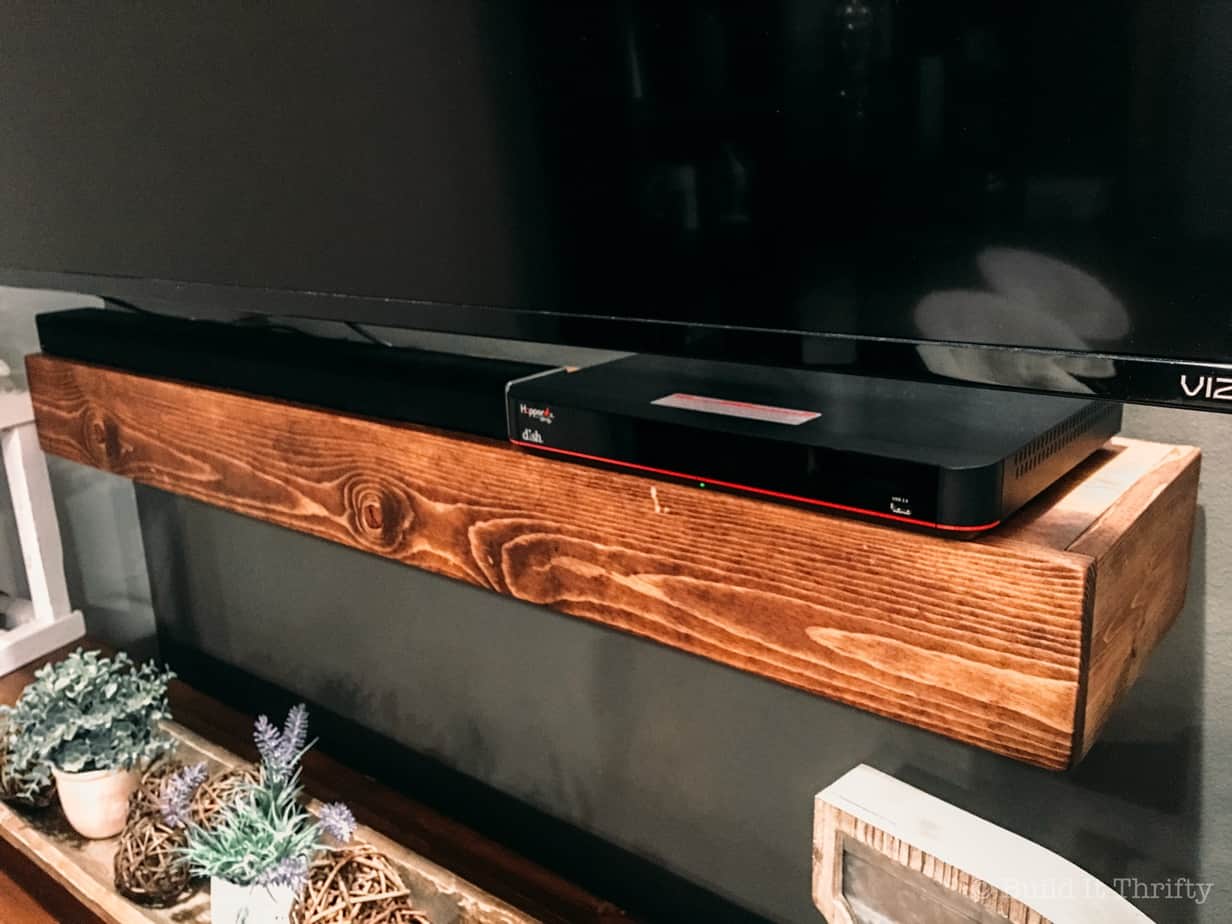
Now, slide your shelf box over the supports. Check again and make sure everything is level. If it isn’t level, you could put a little wood shim in between the support and the shelf box to make it level. I was fully prepared to have to do this but much to my surprise everything was perfectly level! I drilled two 1″ wood screws through the top of the 1×12 to attach the box to the 2×4 support so it wouldn’t shift around.
There you go! A simple DIY floating shelf that hides that unsightly outlet. Some of the cords are actually inside the shelf box totally hidden. Some of the others aren’t completely hidden but they are a lot less visible. It looks so much better than before and I have one happy mom-in-law. 🙂


No Comments