
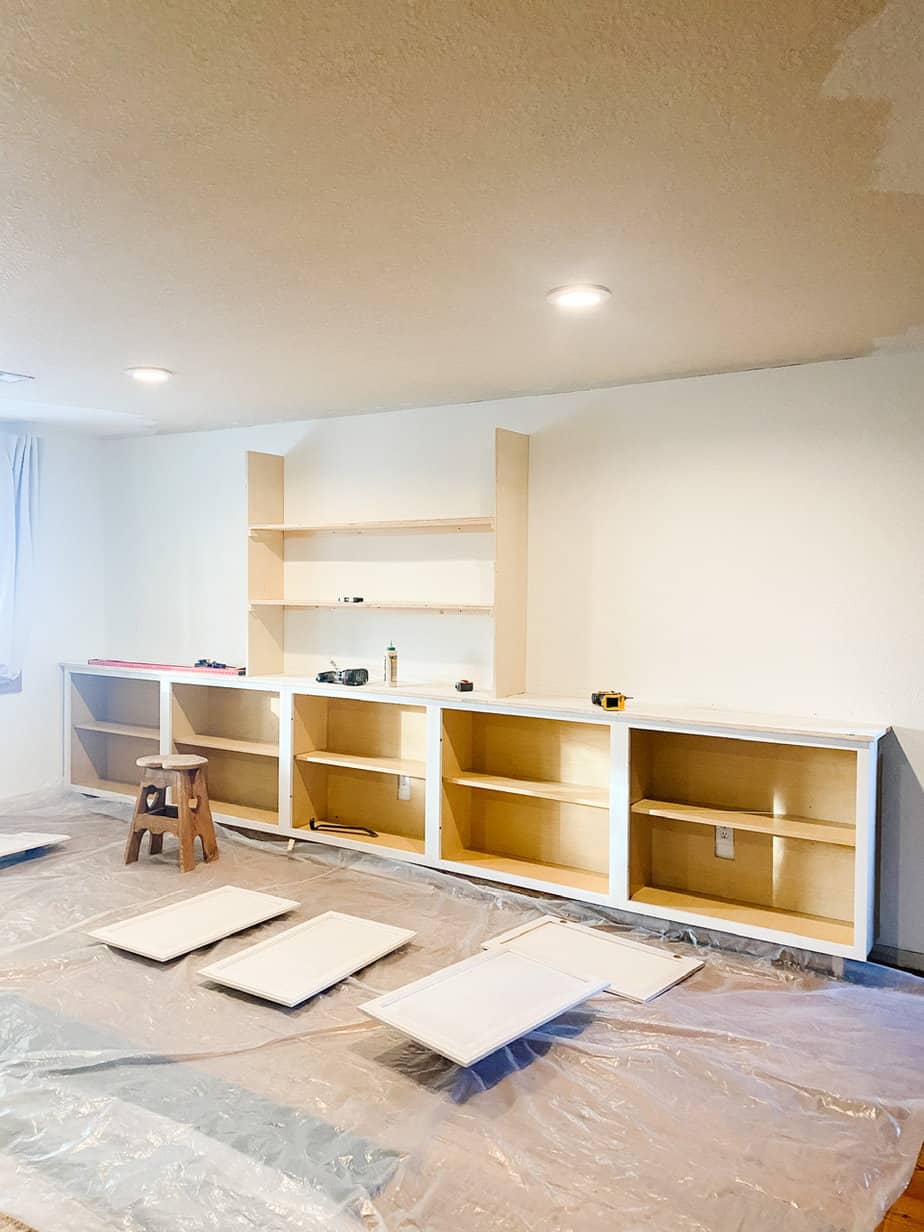
It’s time to move on to the part two of these living room built-ins which means it’s time for shelves and the face frame! If you missed part one (building the base) click here to read that. I went back and forth on how many sections of shelves to do. Normally, shelves are lined up with each section of cabinets. Since I’m working with an odd number of cabinets, lining them up was a little tricky. I ultimately went with three sections of shelves spaced out evenly along the base cabinets and decided I wanted them close to 11 inches deep. I completed the middle section to see how it would look and here’s where we left off…
(This post contains affiliate links)
Materials:
- 3/4″ plywood
- 1x2s
- Screws
- Wood glue
- 4’x8″ shiplap panels (optional)
Tools
- Miter saw or circular saw
- Drill
- Nail gun
- Laser level or large regular level
- Stud finder
- Kreg Jig
- Clamps
Step One (Build the Shelves):
FYI-When determining the shelf depth, keep in mind that there will be a face frame added later which needs to be accounted for as it will increase the total depth.
The base cabinets are 12″ with a 1″ overhang on the countertops. I ended up cutting the shelf boards to 10-1/2″. After the addition of the 3/4″ face frame, it bumps out to roughly 11-1/4″ for the total depth.
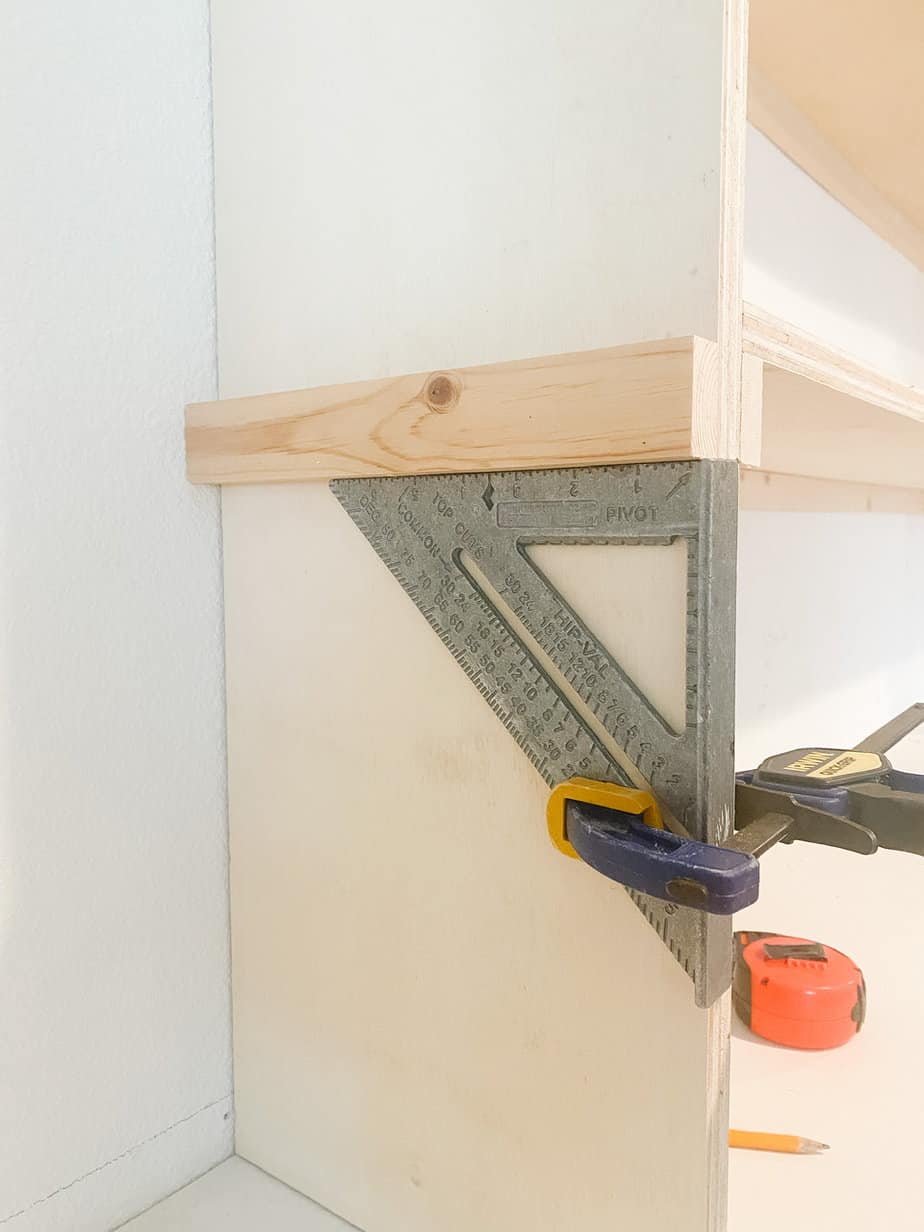
These shelves are really long and need some sturdy support. Depending on the length of the shelves, there are several ways to do this. Some people double up on the vertical plywood underneath the shelves creating a ledge for them to rest on. However, this method is usually for shelves that aren’t as wide as these. Because of the length, they needed side support as well as support along the back. I ended up using 1x2s for my supports. If I could get into a time machine and build the supports using thinner boards to make them less visible, I probably would (this will make more sense when you get to step three). At the end of the day, it’s not a huge deal and they still turned out beautiful once everything was painted all white and decorated.
I started by adding the side supports to the vertical shelf boards. I used wood glue and the nail gun to attach these. Having a ledge for them to rest on while you attach makes it a lot easier plus you will know it’s perfectly level.
Use the stud finder again and mark the studs along the back of the wall. Drill a pilot hole through the 1×2 to prevent splitting then attach them to the studs. Now it’s time to cut the plywood shelves and use wood glue and the nail gun to attach them to the support boards. These shelves are spaced 15″ apart. Shelf spacing will vary depending on how many shelves you want and the height of the ceiling.
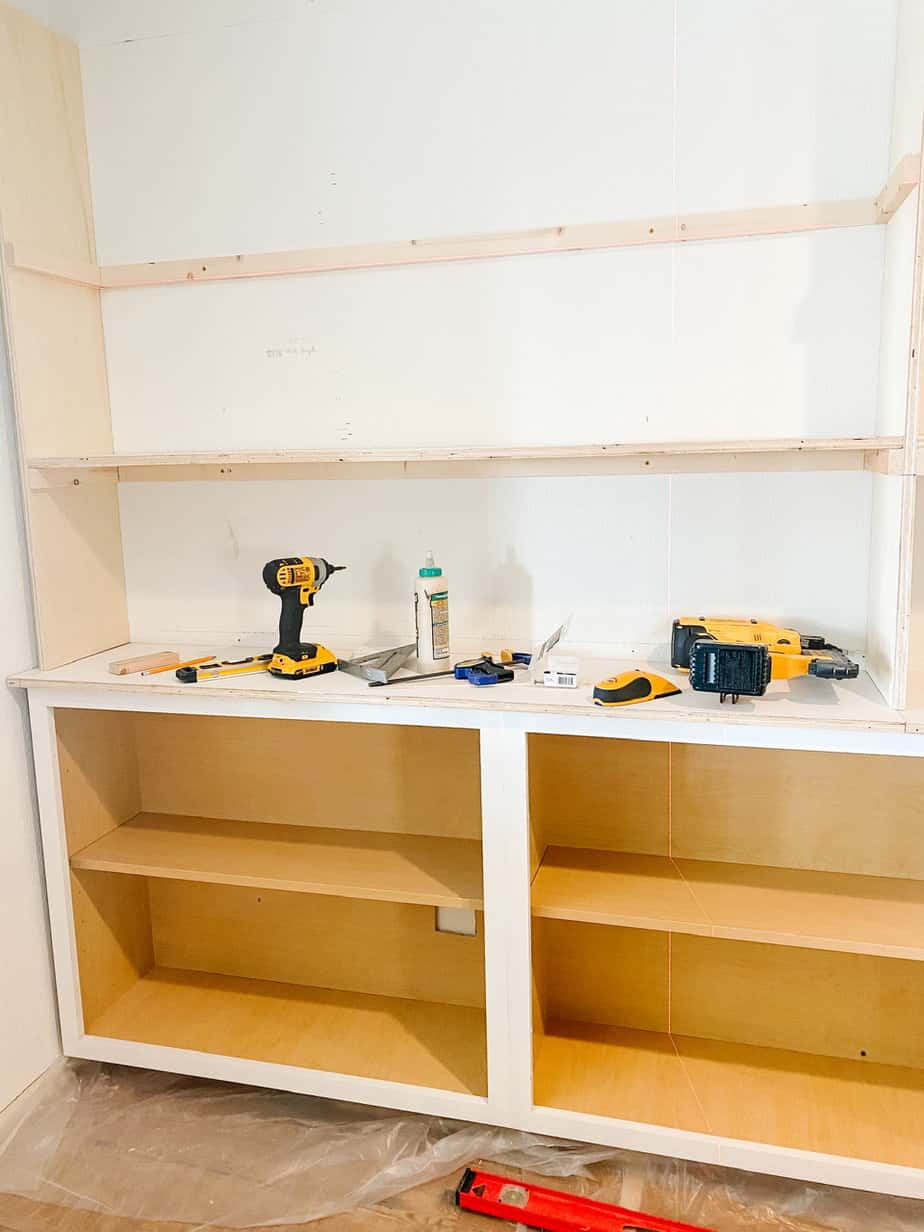

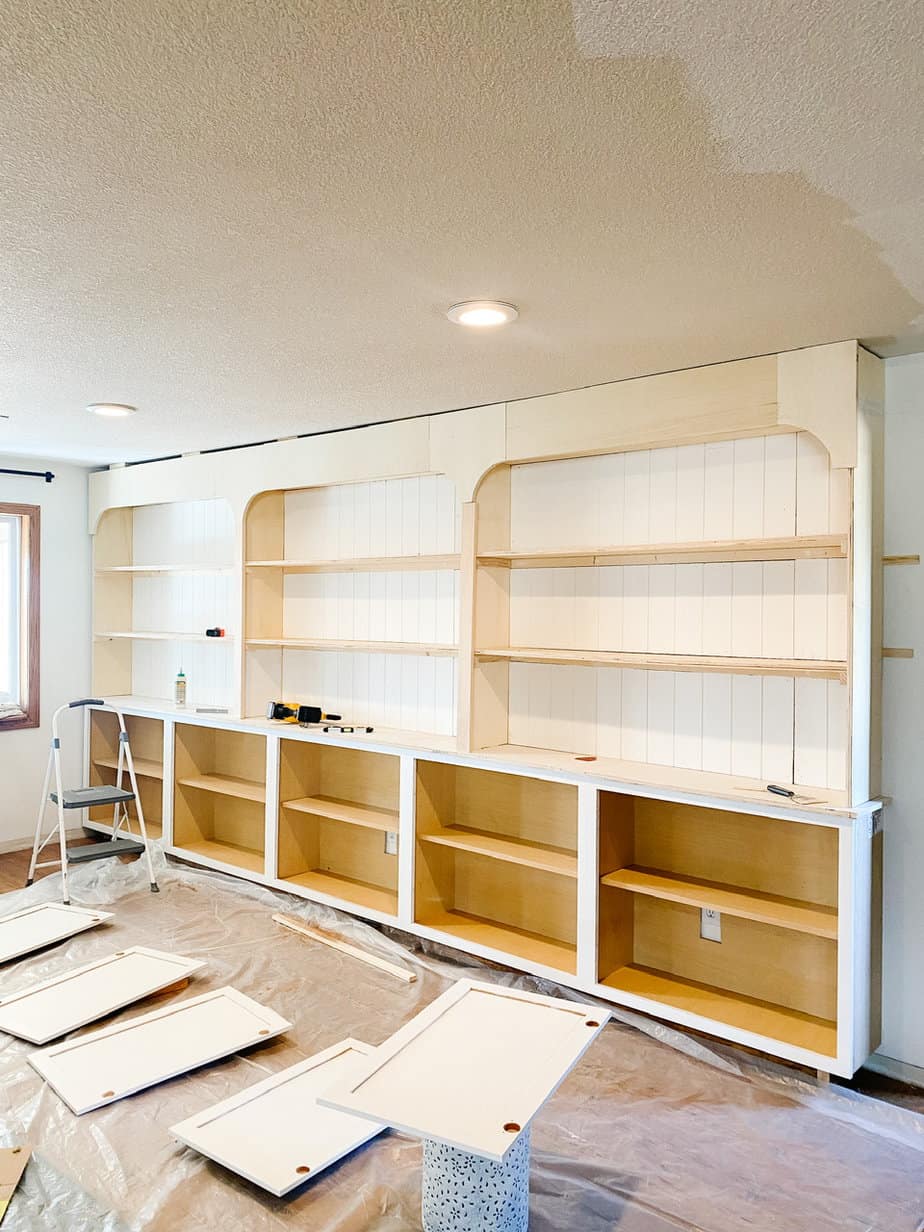
Here are the completed shelves without the tops. That’s the next step. I added the tops in three sections. I don’t have a picture of this so it is a little hard to explain. The middle section and both end sections will meet up and share support from those two vertical boards in the center so measure accordingly. Hope that makes sense.
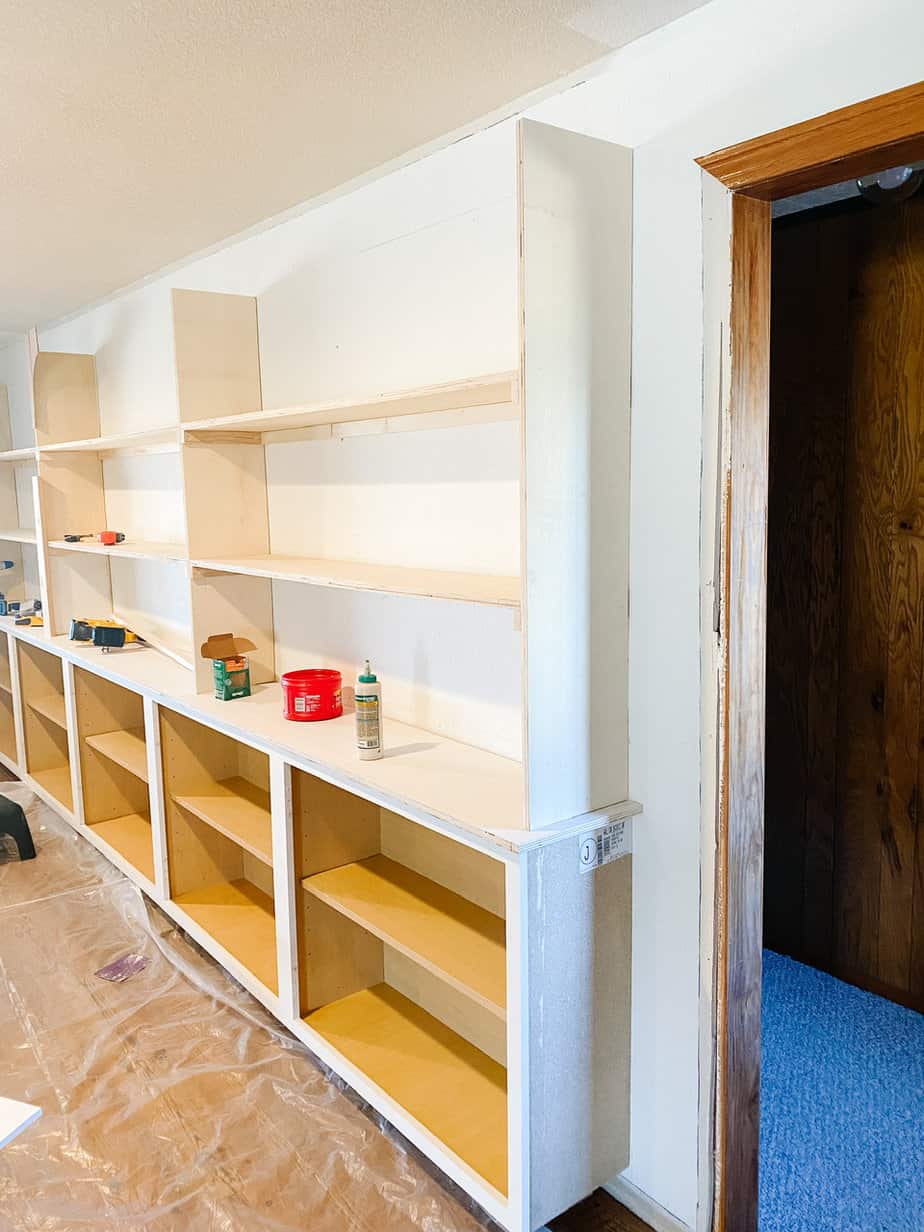
Now that the shelves have tops, I built and installed these plywood boxes between the tops of the shelves and the ceiling to have something to attach the face frames to. There are two boxes per shelf section. They are the same depth as the shelves, 10.5″, and screwed into the wall and ceiling studs. I also nailed up into the bottom of the boxes from underneath the shelf.

Step Two (Build the Face Frames):
I knew that creating these curved face frames wouldn’t be easy and I racked my brain on how to fabricate those curved corners. I ended up making a template first from cardboard to get the perfect curve. Then, I just traced that template onto plywood and used a jigsaw to cut the curves. Once I had all the curved sections fabricated, I cut the long boards that would connect the pieces together. I drilled pocket holes with the Kreg Jig to connect them.
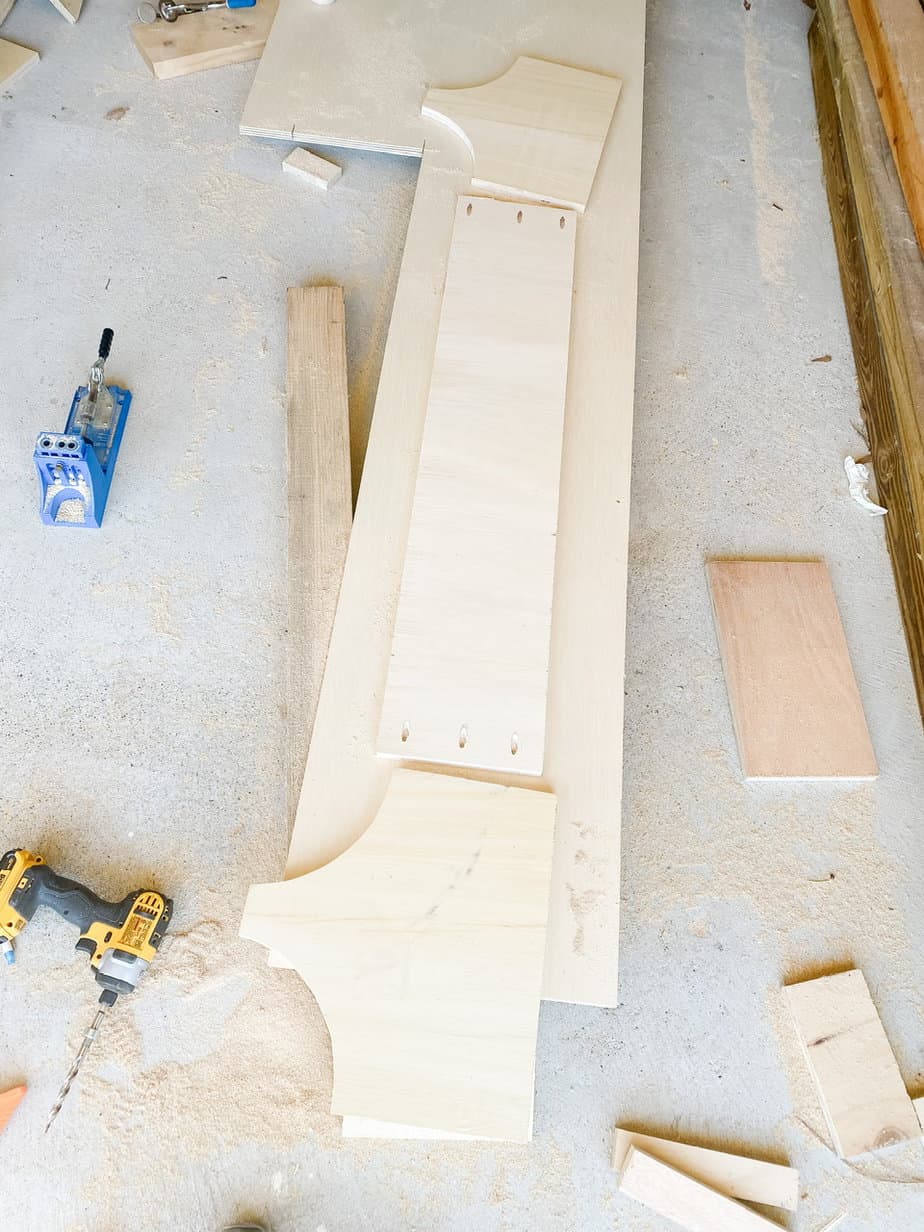
Start with the middle section first, it’s the largest, then attach the two end face frames.

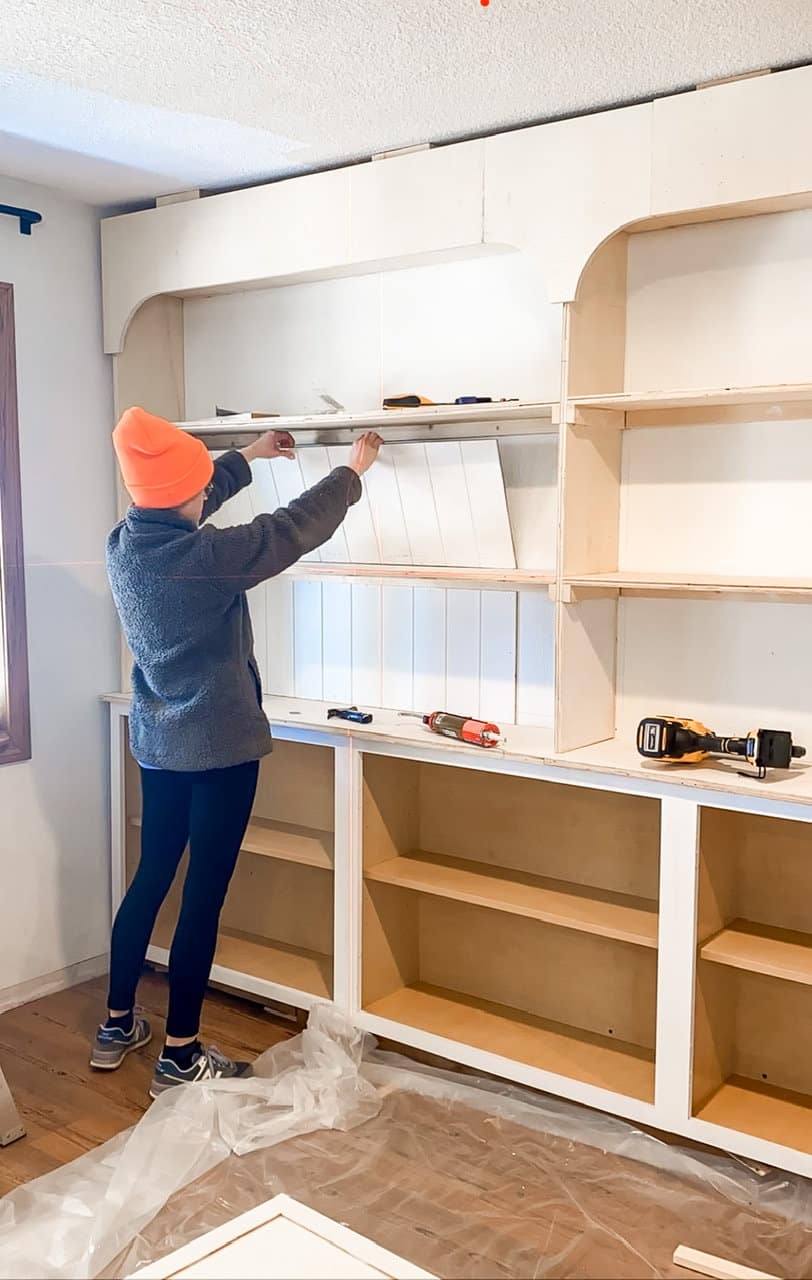
Step Three (Add Shiplap):
Now, it’s time to add the shiplap to the back wall. This step is completely optional! I opted for these thin shiplap panels from Home Depot because actual shiplap boards would’ve been way to thick. Bonus, it’s a lot cheaper this way too…a 4’x8′ panel is less than $40. I ripped them to size then used Liquid Nails and the nail gun to attach to the wall.
Aaaand here’s where we are…definitely getting there! Click here for part three where we’ll add trim and you’ll see how I cover that huge wonky gap from the unlevel ceiling…definitely a brain buster. Also, it will be time to paint, style, and reveal!
For even more details on this project, head over to Instagram then click on the highlight labeled “Built-Ins”.


No Comments