
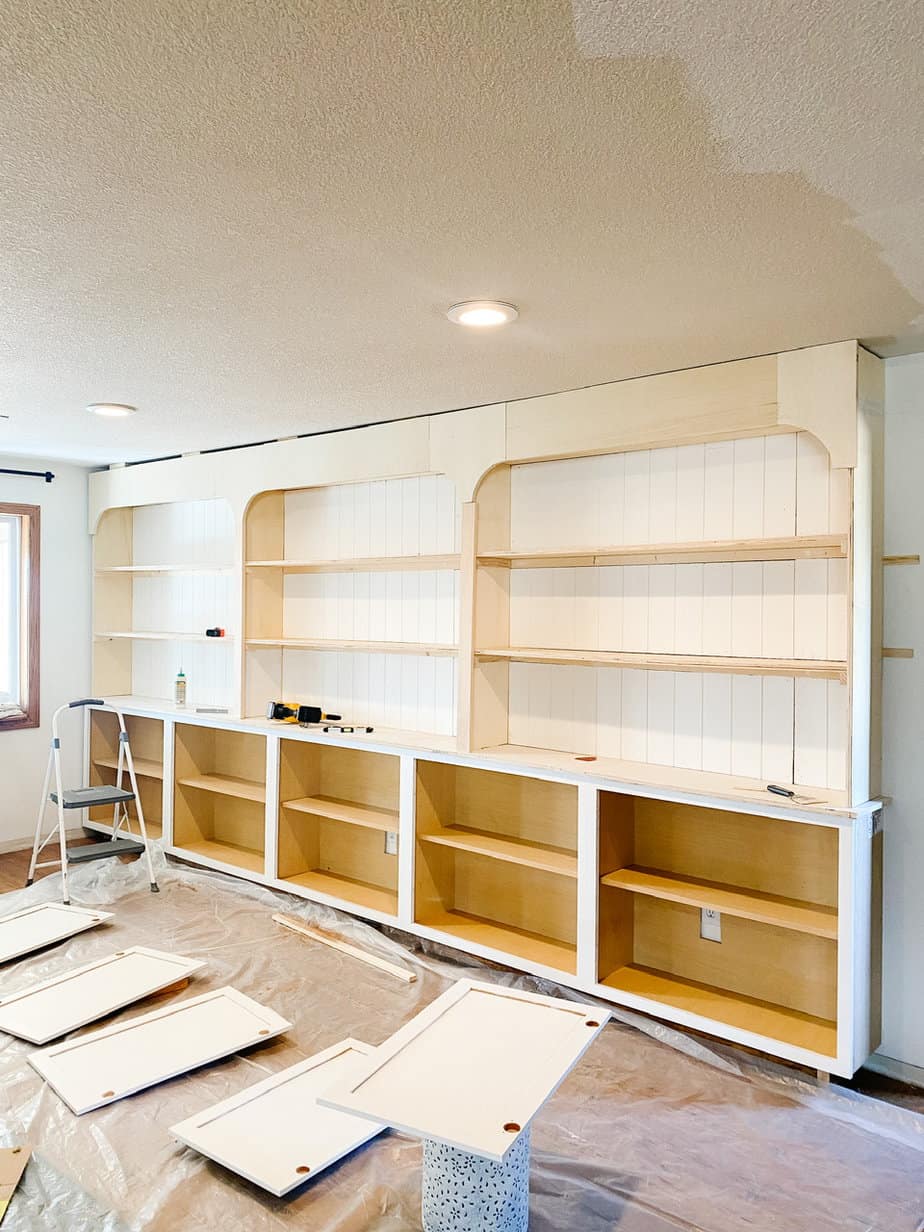
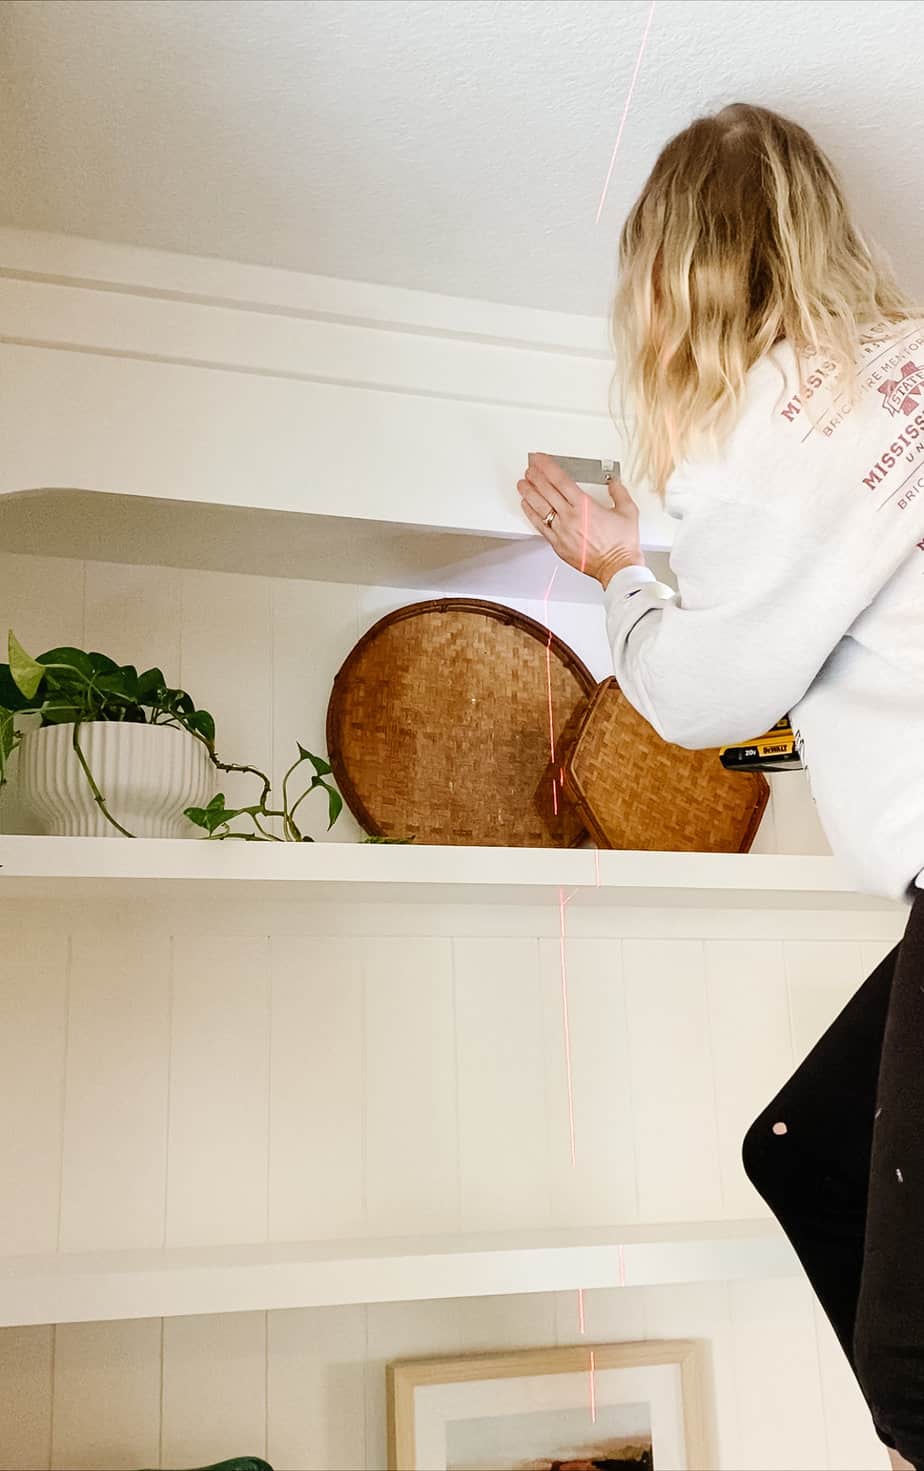
Well, we’ve officially made it to the end of these living room built-ins! It’s time for part three so let’s trim this out so we can start painting and decorating. If you missed part two, you can find that here. This step is where the laser level comes in clutch again. If I haven’t convinced you by now, you need one. Nothing gave me a headache more than installing this trim and you’re about to see why.
Here’s where we left off from part two. See how that gap just keeps getting bigger and bigger to the left? After I added the face frame, I was left with about an 1-1/2″ gap on the far left. Who knows how long I spent staring at this gap trying to figure out the best way to hide it. Ultimately, I decided stacking the trim would be the easiest way to trick the eye. I went out and bought different sizes of trim and played around with combinations until I found something my OCD brain could live with.
Before I get ahead of myself, see all those seams where the curved portions meet up? I sanded those then filled them with joint compound to make everything look like one smooth uniform piece. I actually did this for pretty much any seams and also on any unfinished ends of plywood on the curved portions of the face frame. Yes, I could’ve used edge banding for this but I didn’t have any and I’m lazy. This step needs to be done before priming.
(This post contains affiliate links)
Materials
- 1x2s
- 1/2″ x 3-1/2″ primed wood trim
- 1-1/4″ primed wood molding
- Scrap 1/4″ plywood
- Primer and paint
- Caulk
- Joint compound
- Liquid Nails
Tools
- Miter saw or circular saw
- Laser level
- Nail gun
It all started with this 1/2″ thick baseboard. It’s pretty low profile which is good and easy to scribe. I had to keep it full size on the left then scribe it the further right it went.
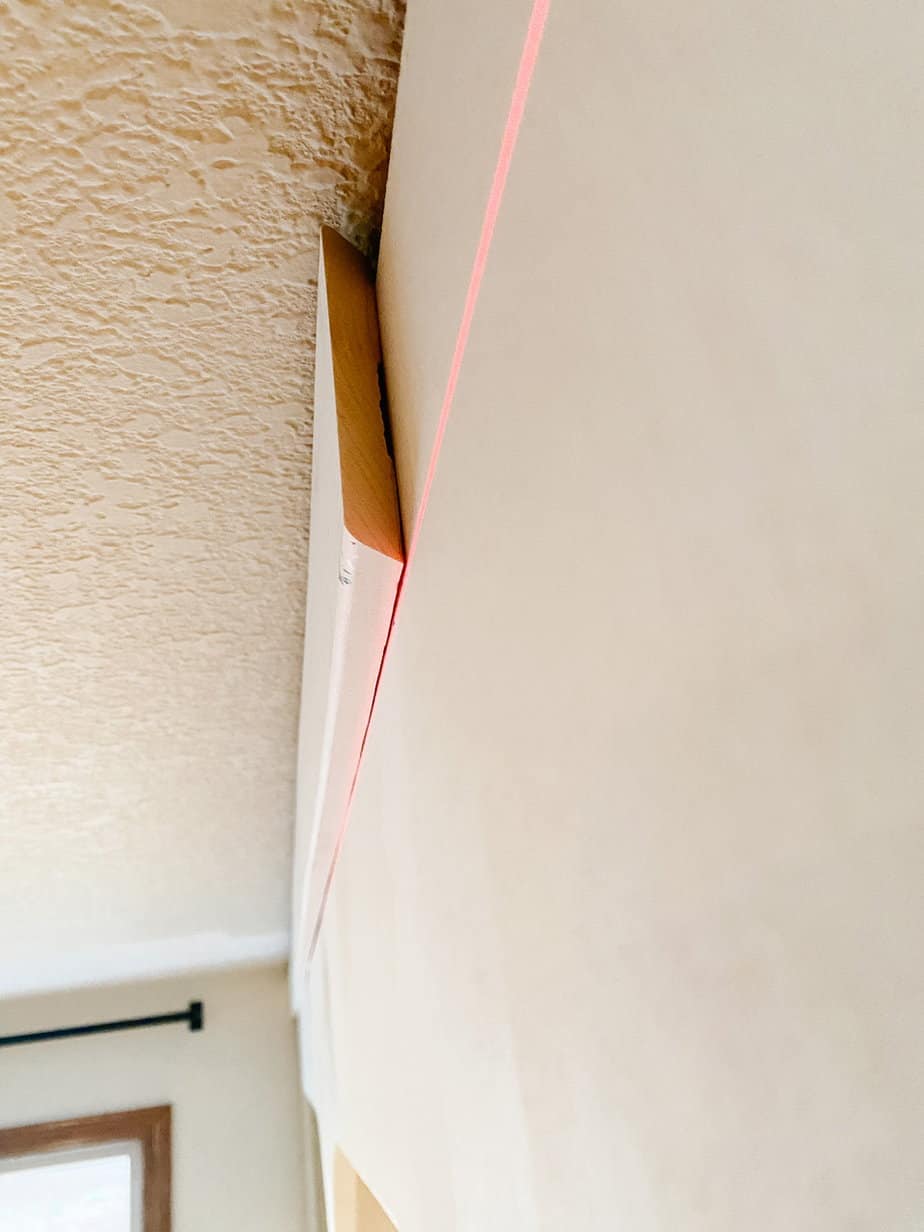
Next, I added a 1×2 on top of the baseboard which hid the gap just a bit more. I did the same thing as before leaving it full size on the left side then scribing it on the right. After everything was said and done, the pic on the left shows the gap that I was left with. Still pretty big, but a far cry from where it started.
I tossed around the idea of floating the ceiling down with joint compound but that seemed like an even bigger can of worms to deal with. In the end, I decided to fill what gap I had left with spray foam and call it a day. I trimmed the foam after it expanded then caulked over the foam. Once everything is painted white, it really won’t be noticeable.
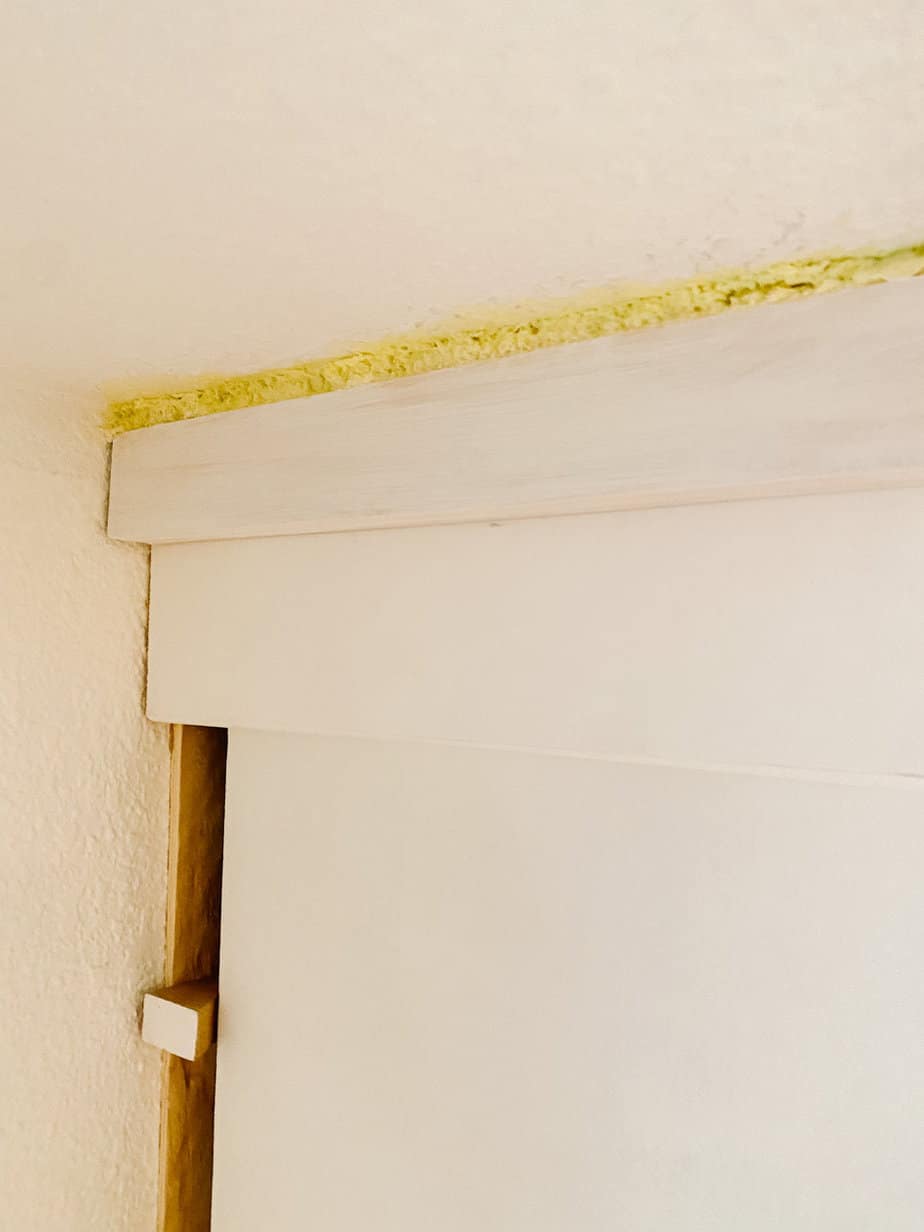
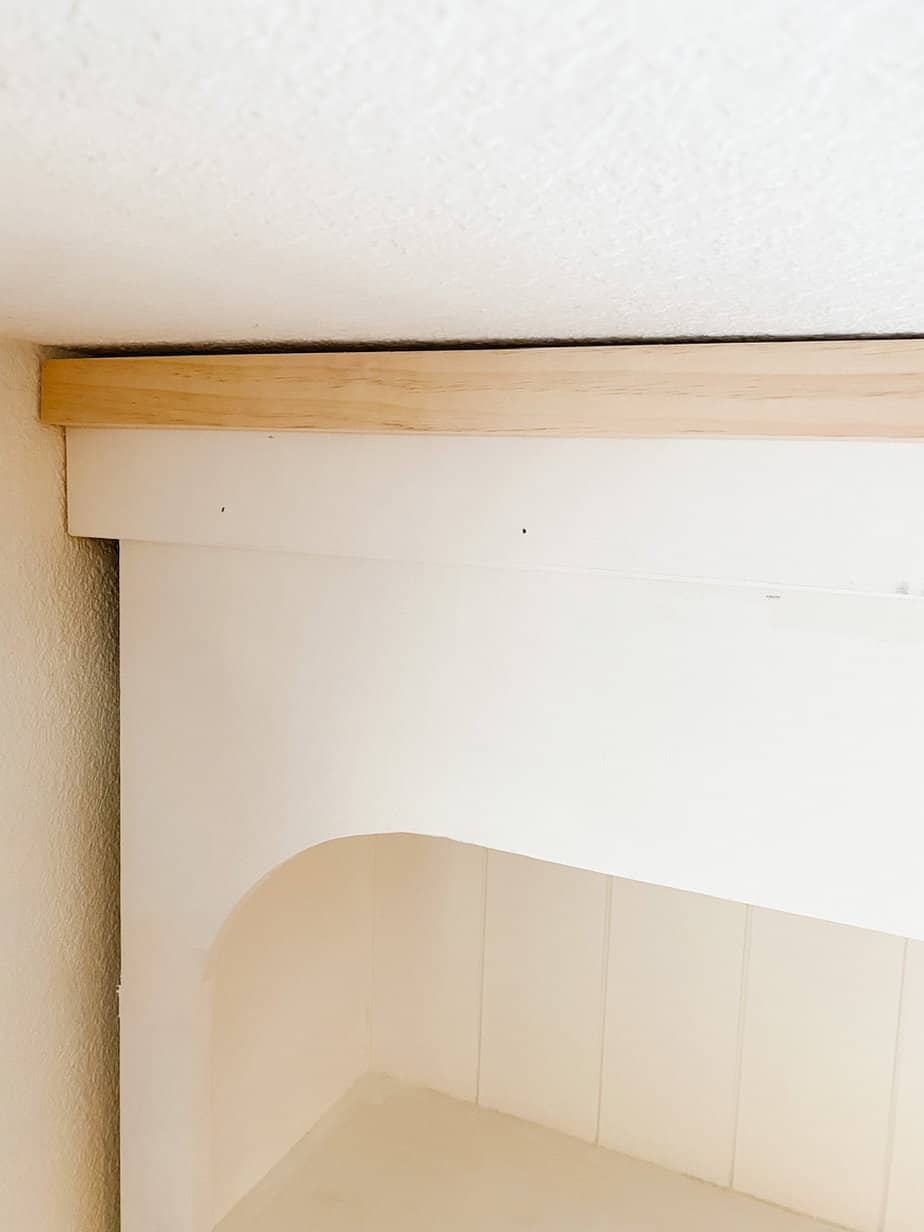
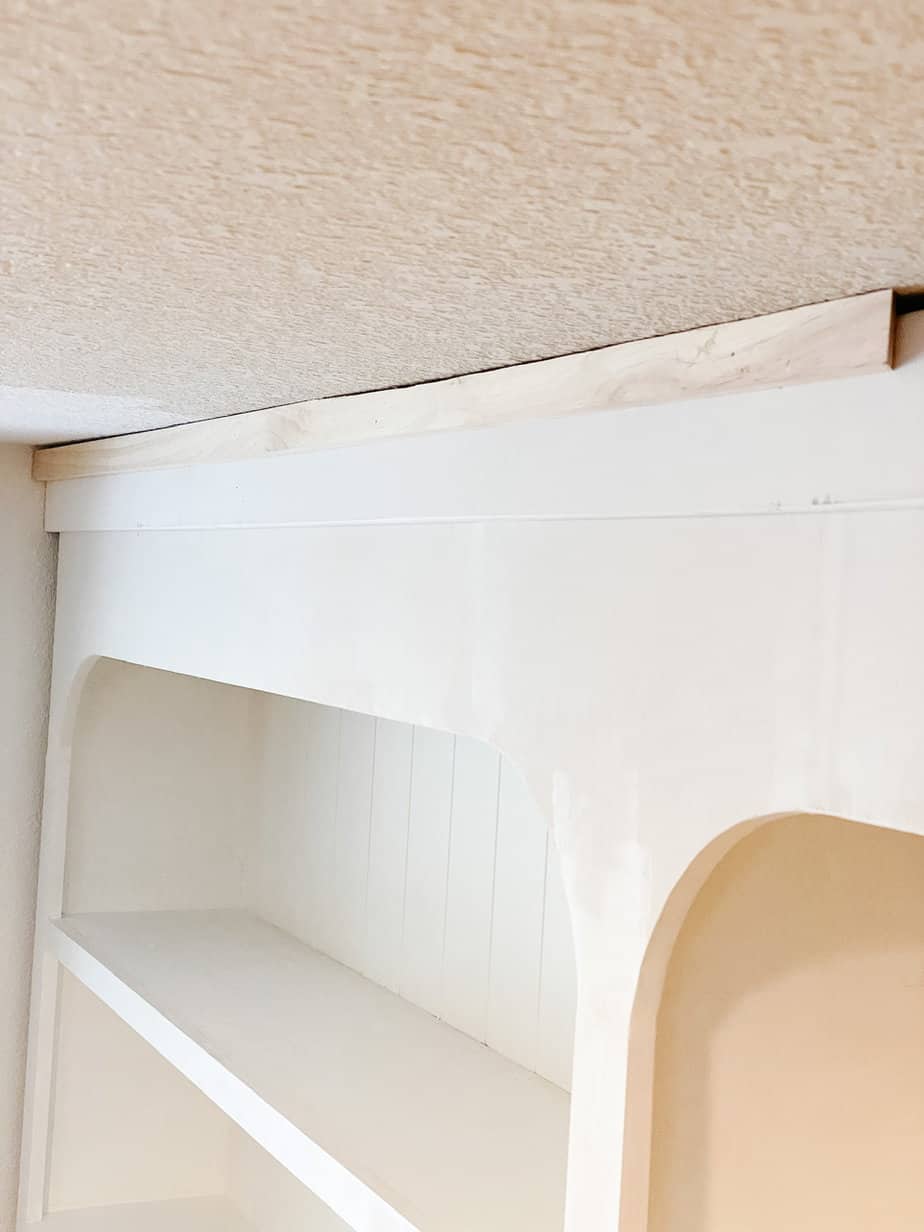
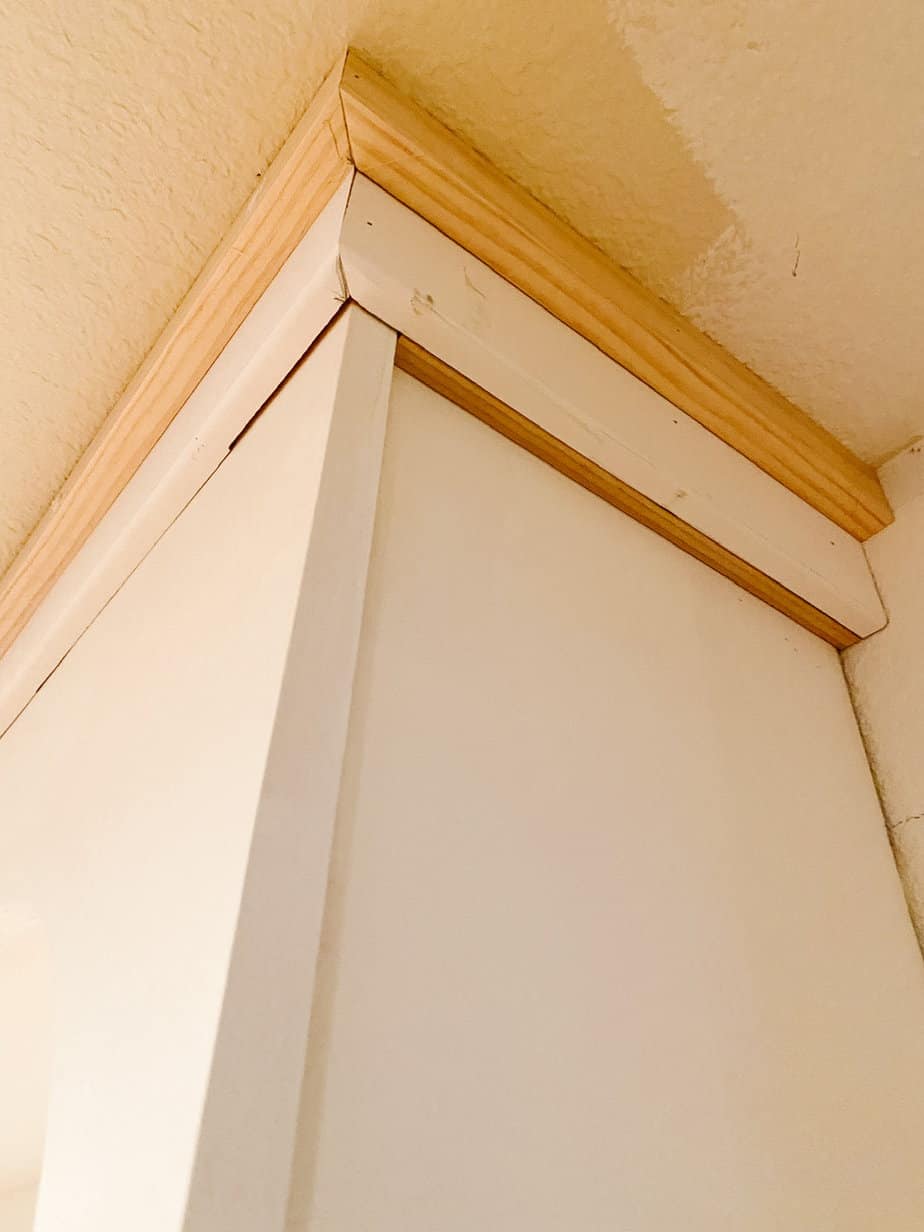
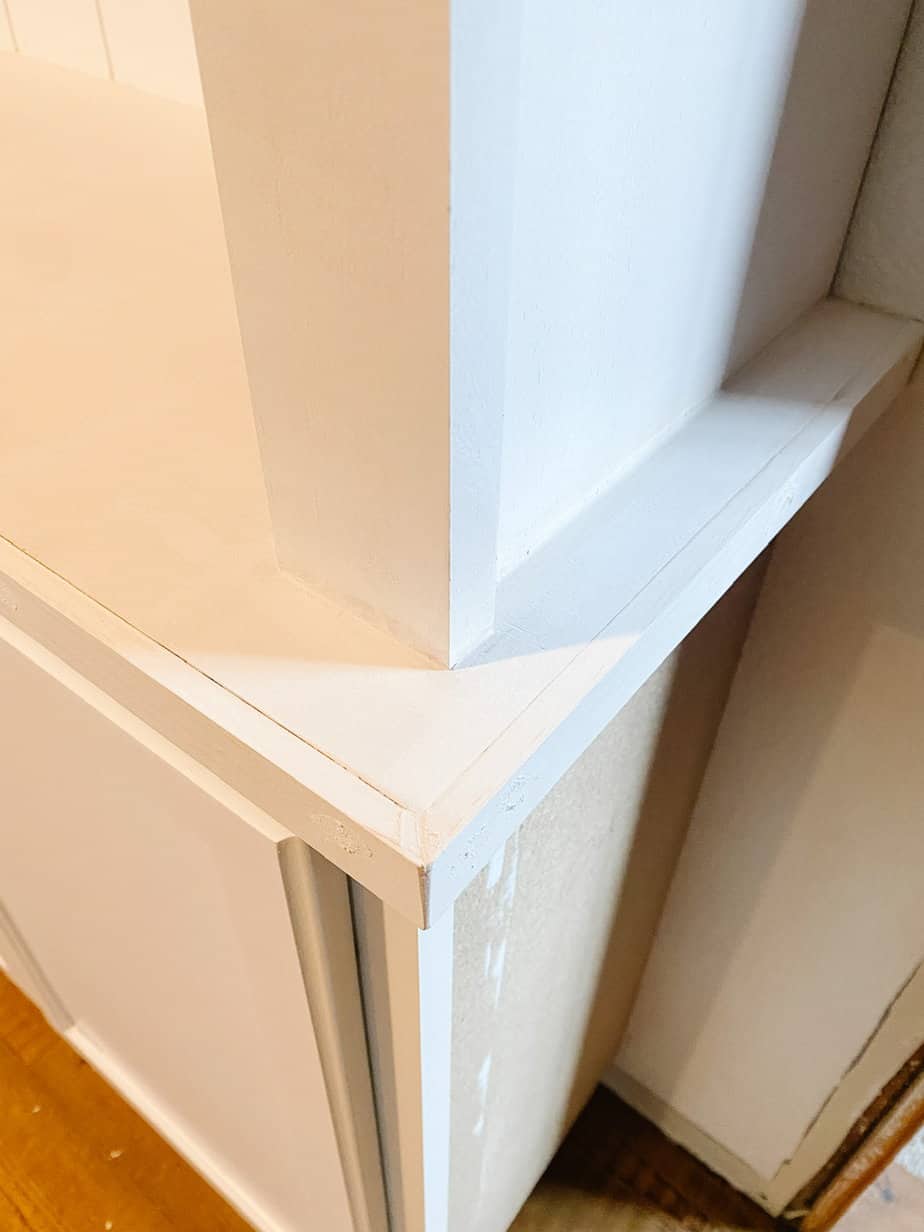
Here is a close-up view of the ceiling trim and how it wraps around. I had to add a little piece of scrap board as a spacer underneath that white trim because I was left with a gap.
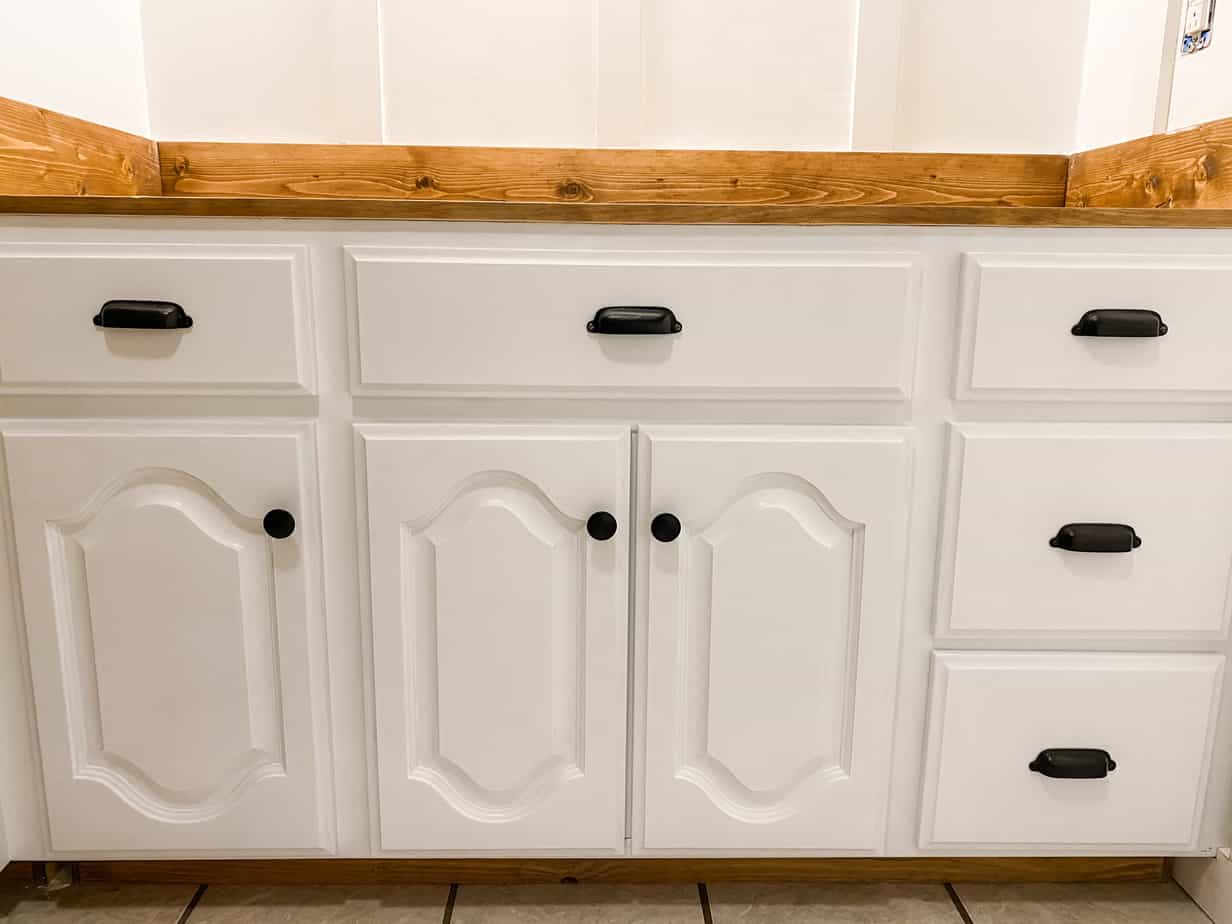
I used a pre-primed white wood molding for the edge of the countertops and the baseboard is the same as the one I used for the ceiling trim. These were both sold by the foot from my local Home Depot in the decorative molding/baseboard aisle.
Here is a close-up view of the countertop trim…
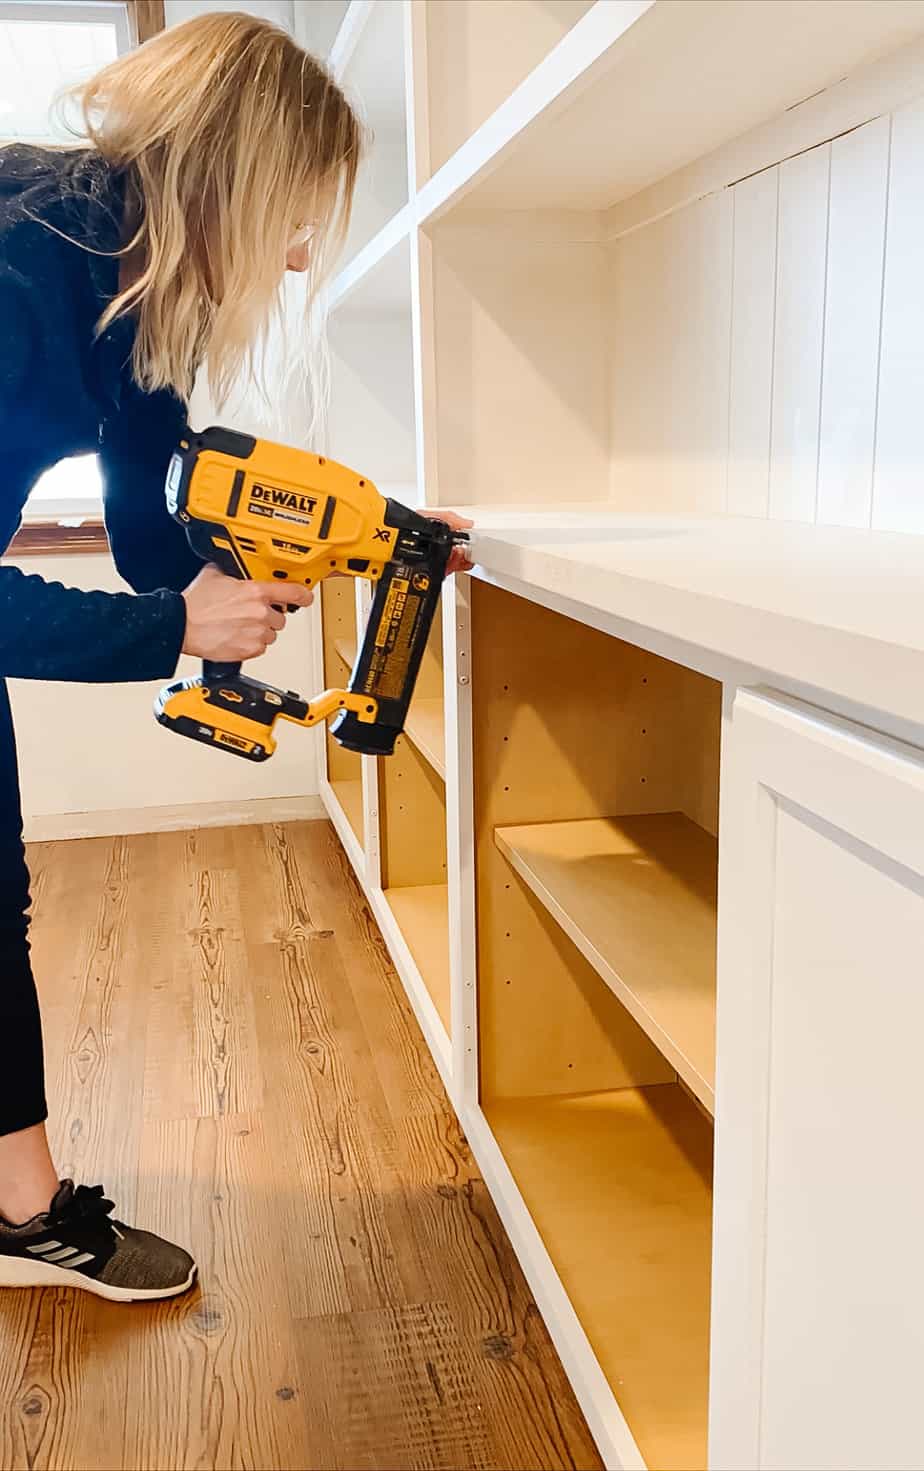
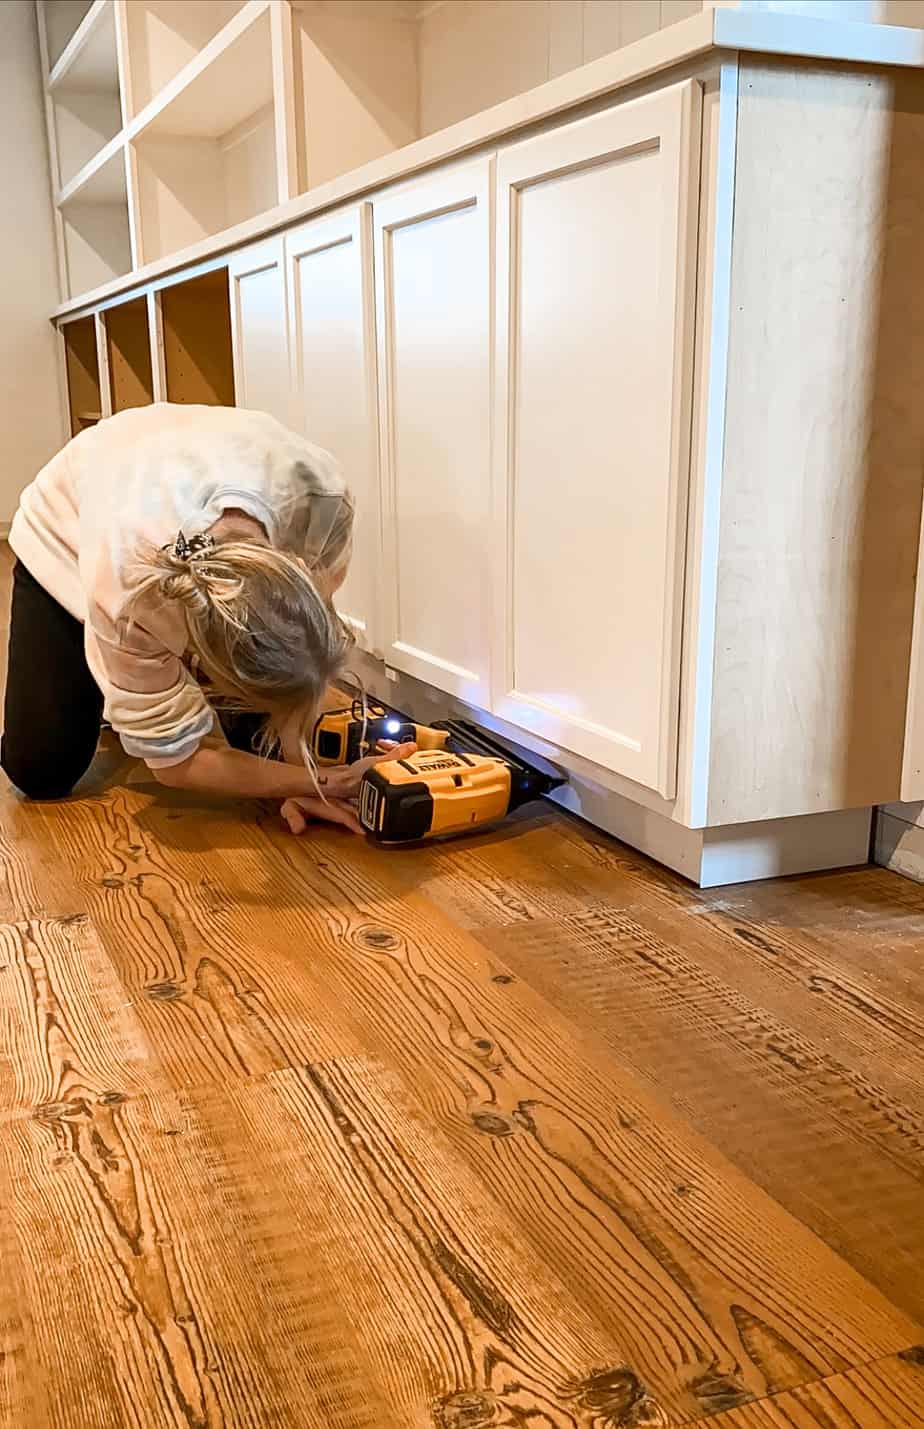
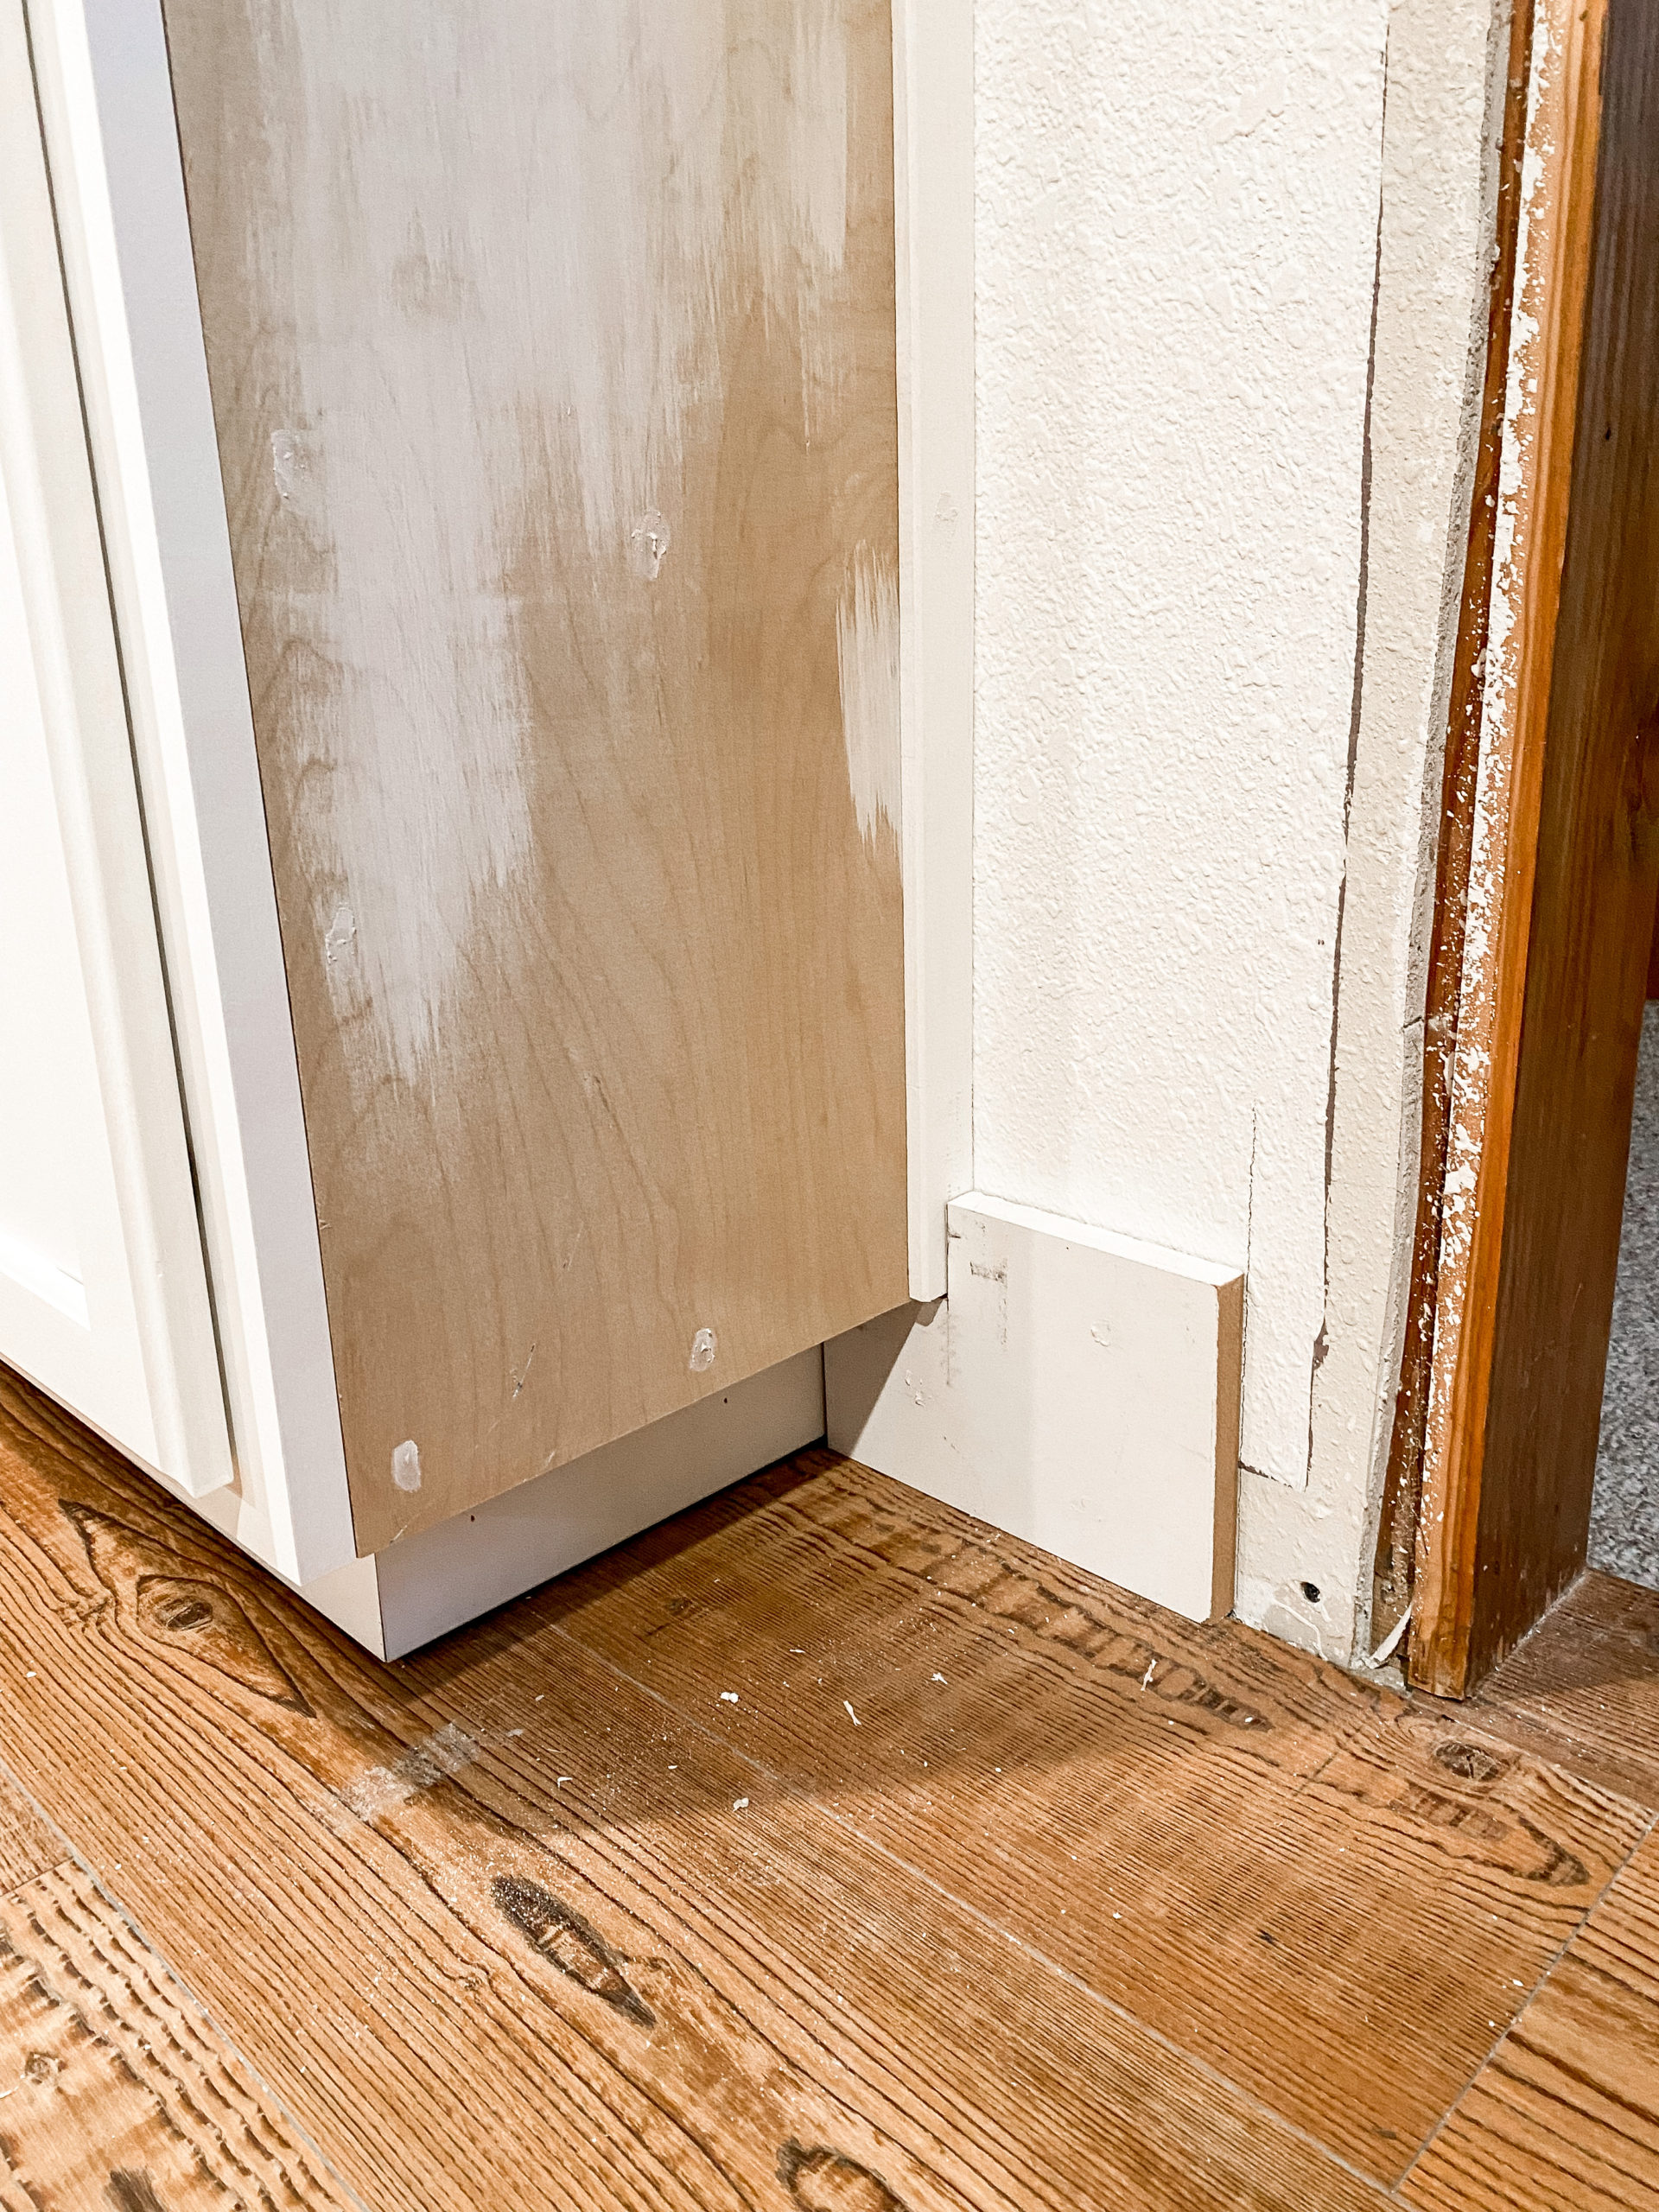
I added a piece of 1/4″ plywood to cover the unfinished end of the cabinets then added trim on both sides. I also trimmed the new thicker baseboard to fit underneath the cabinets.
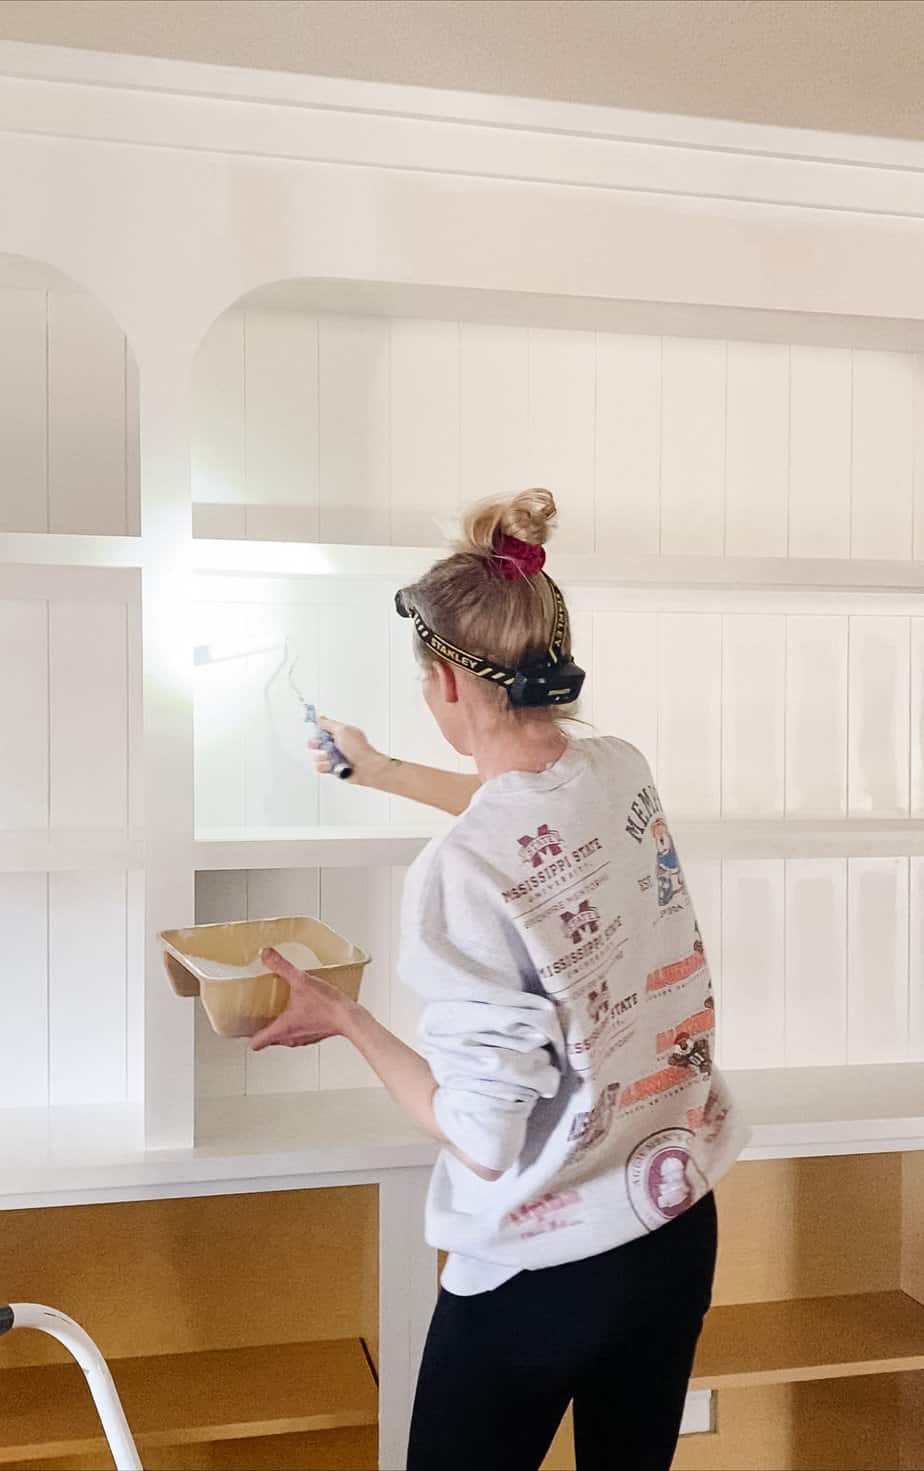
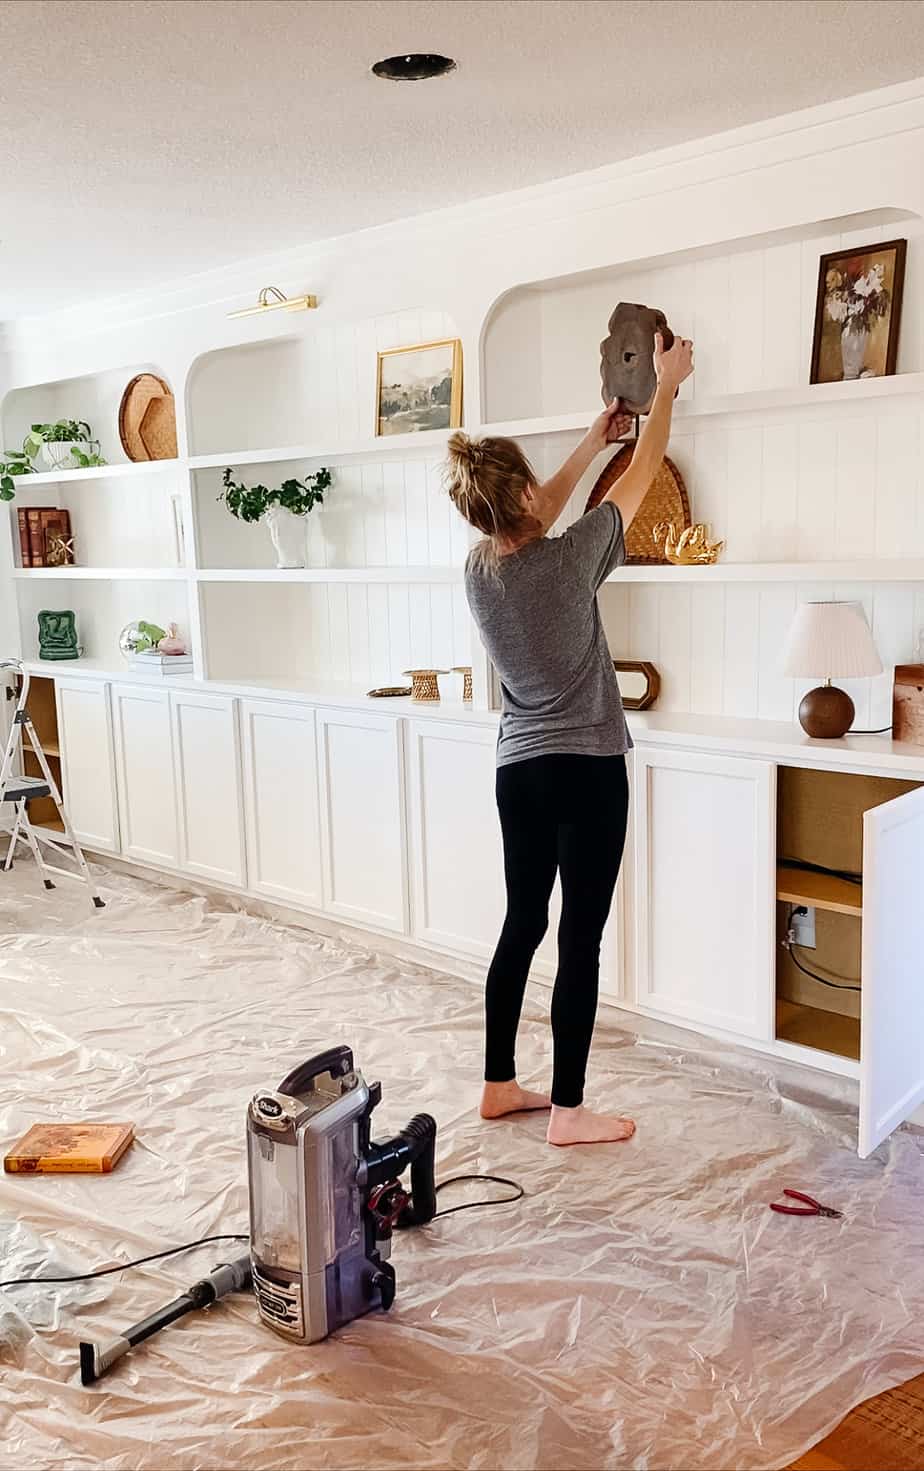
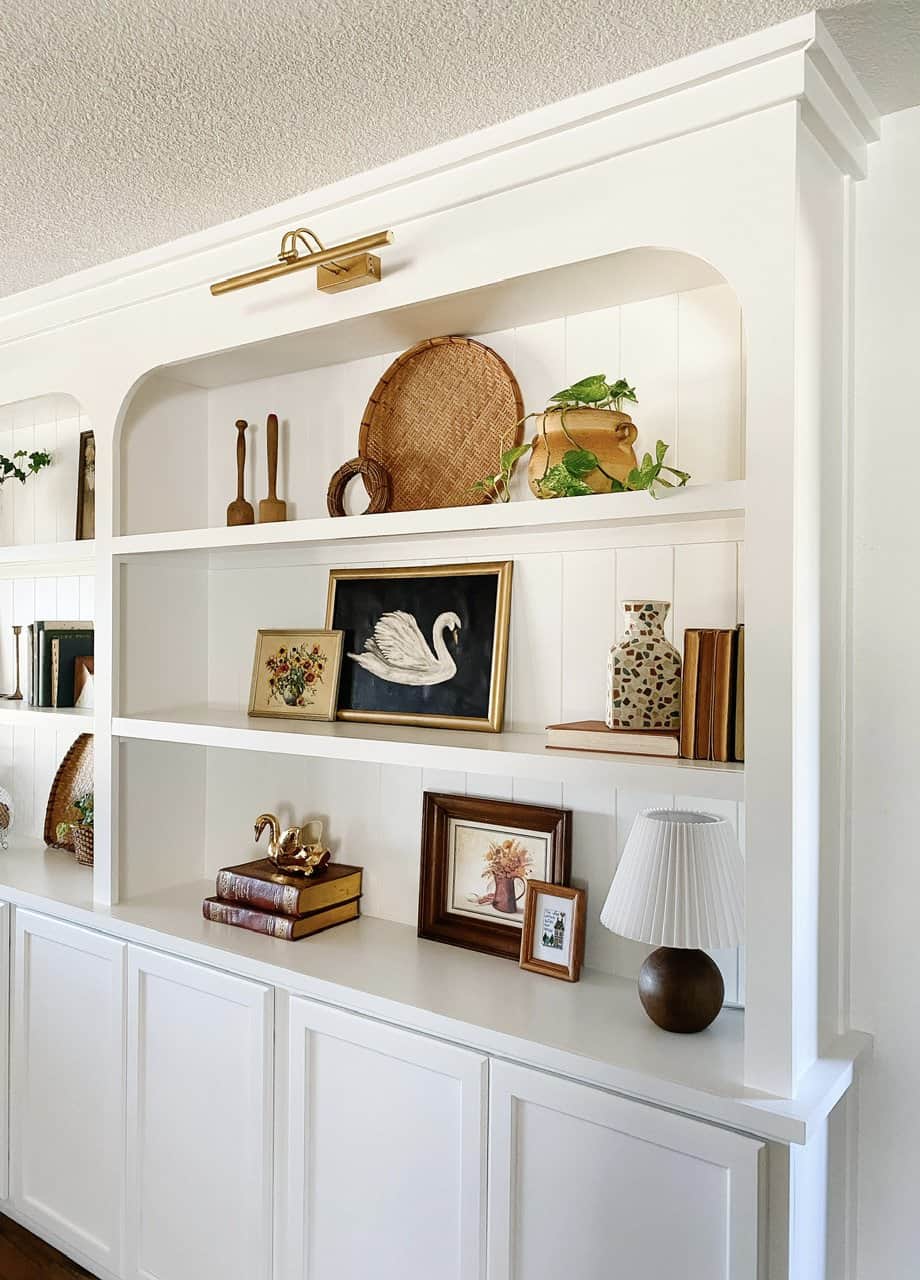
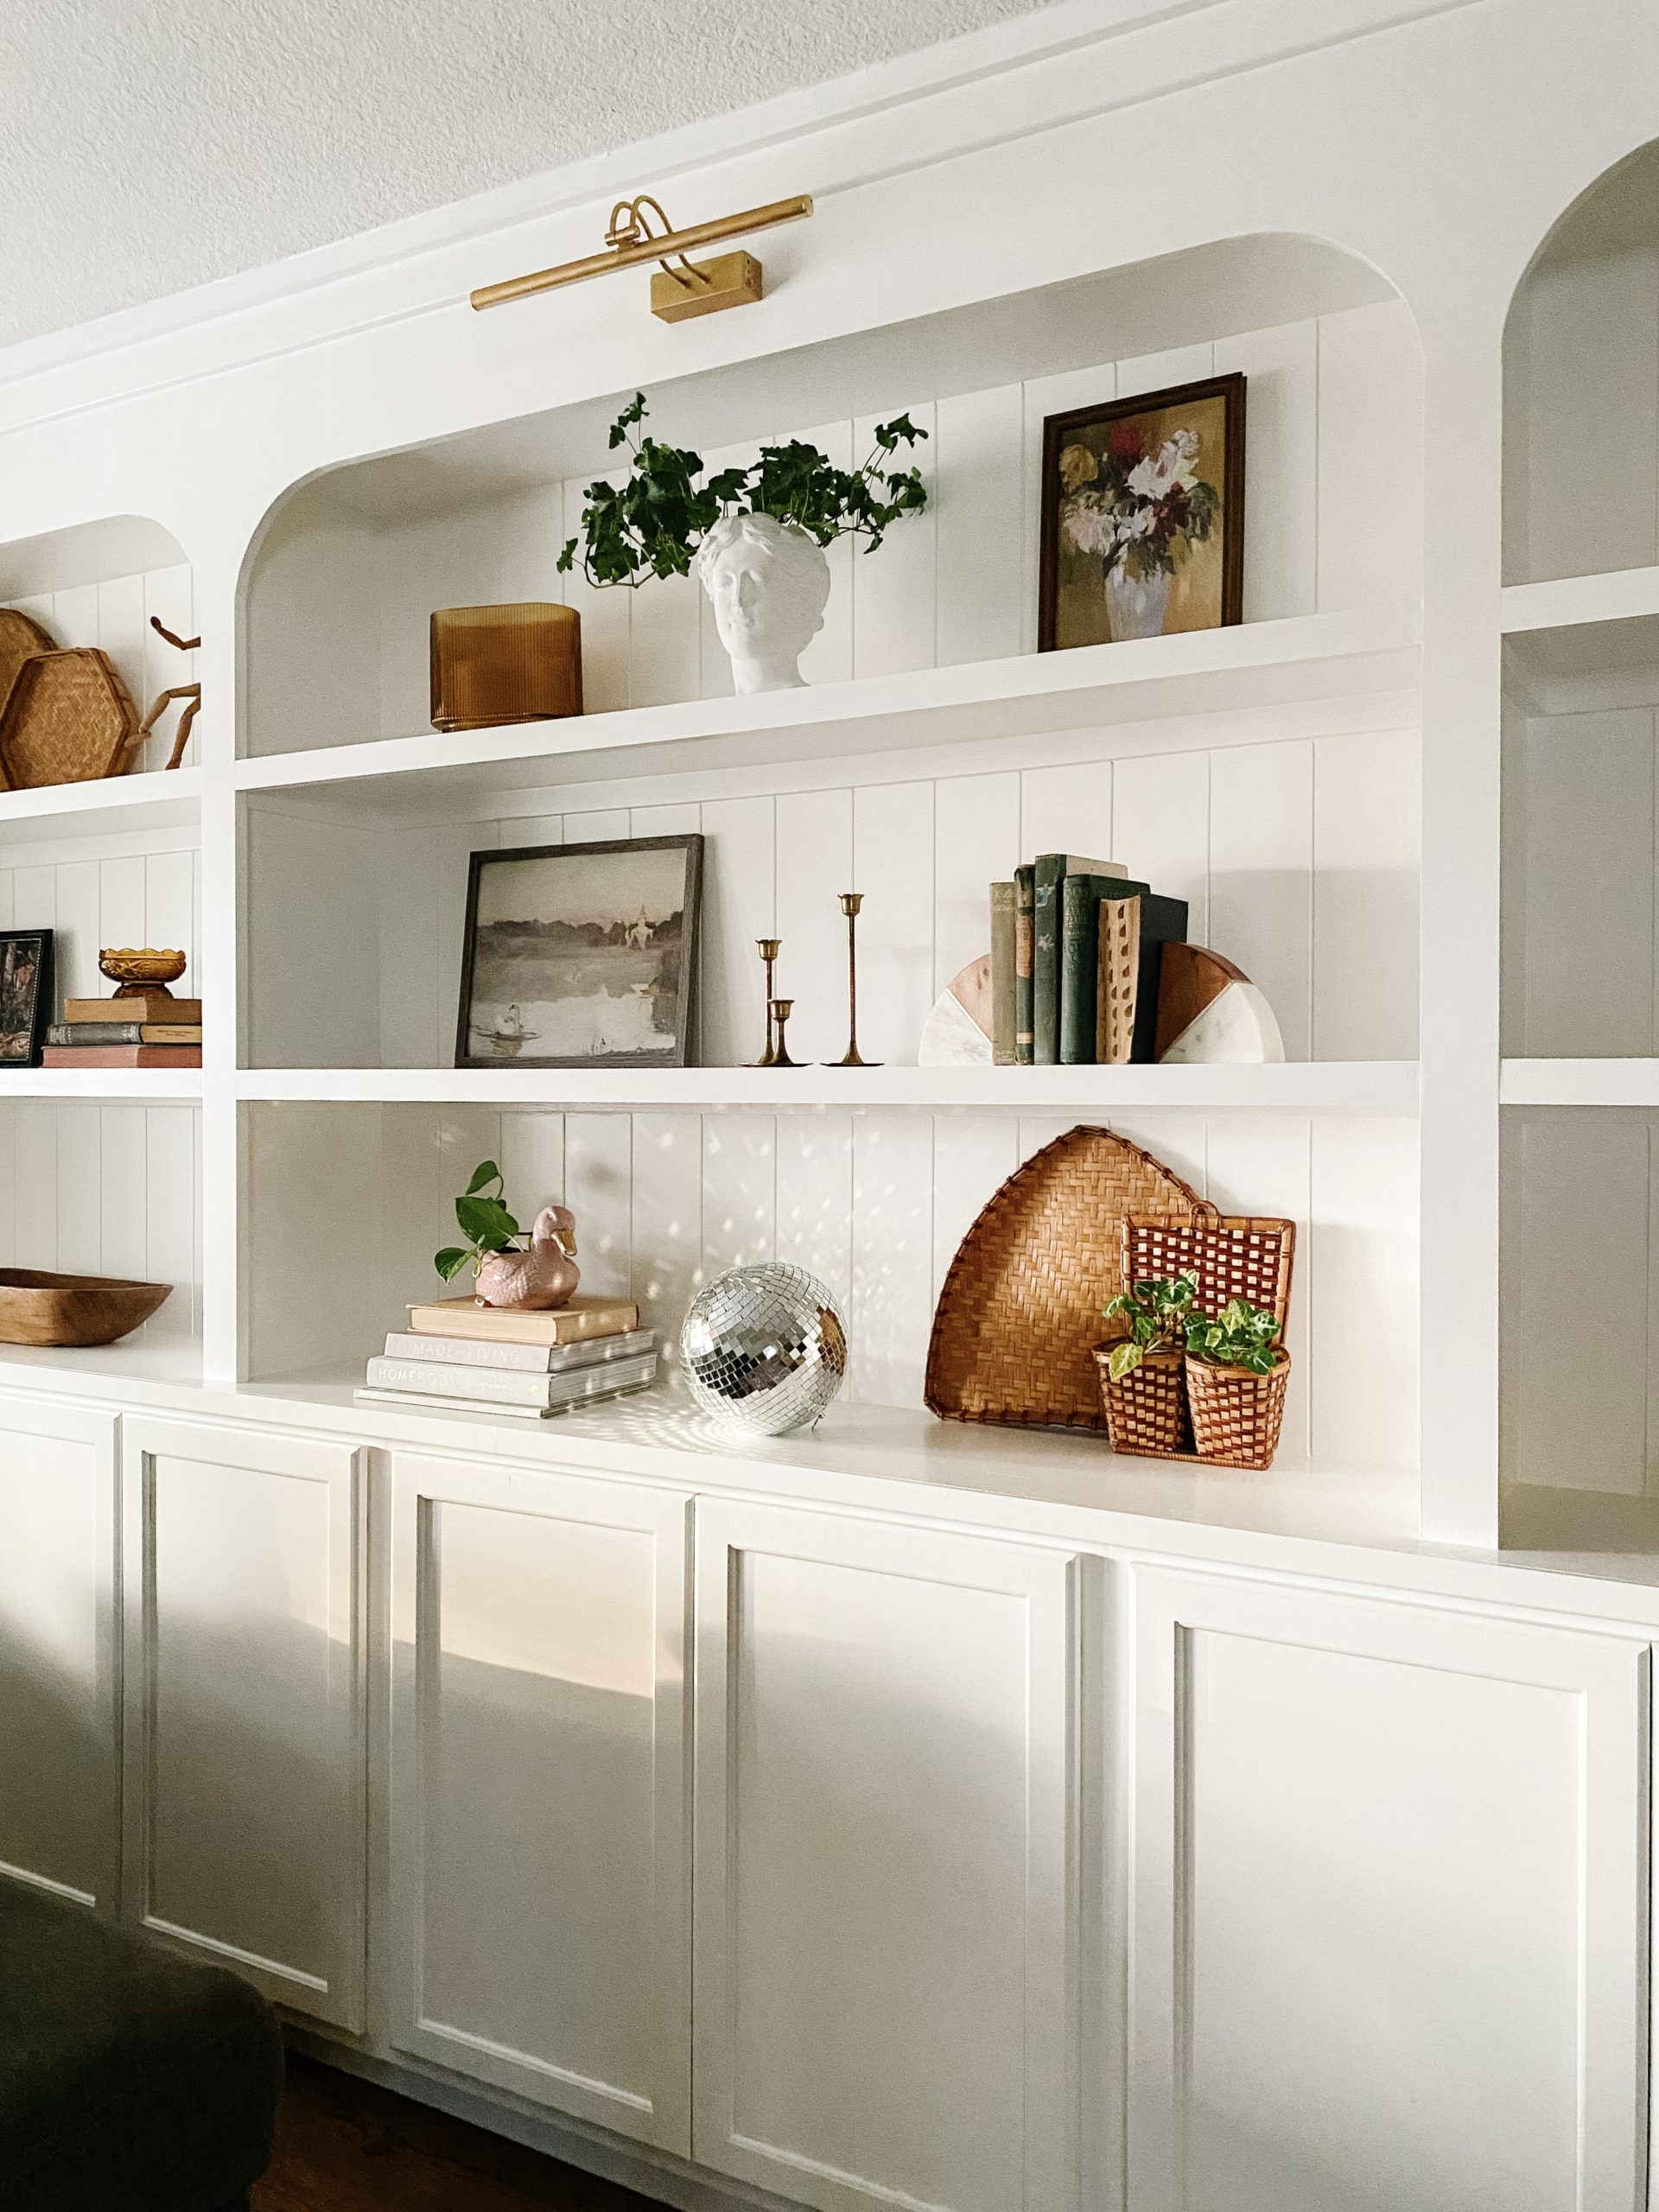
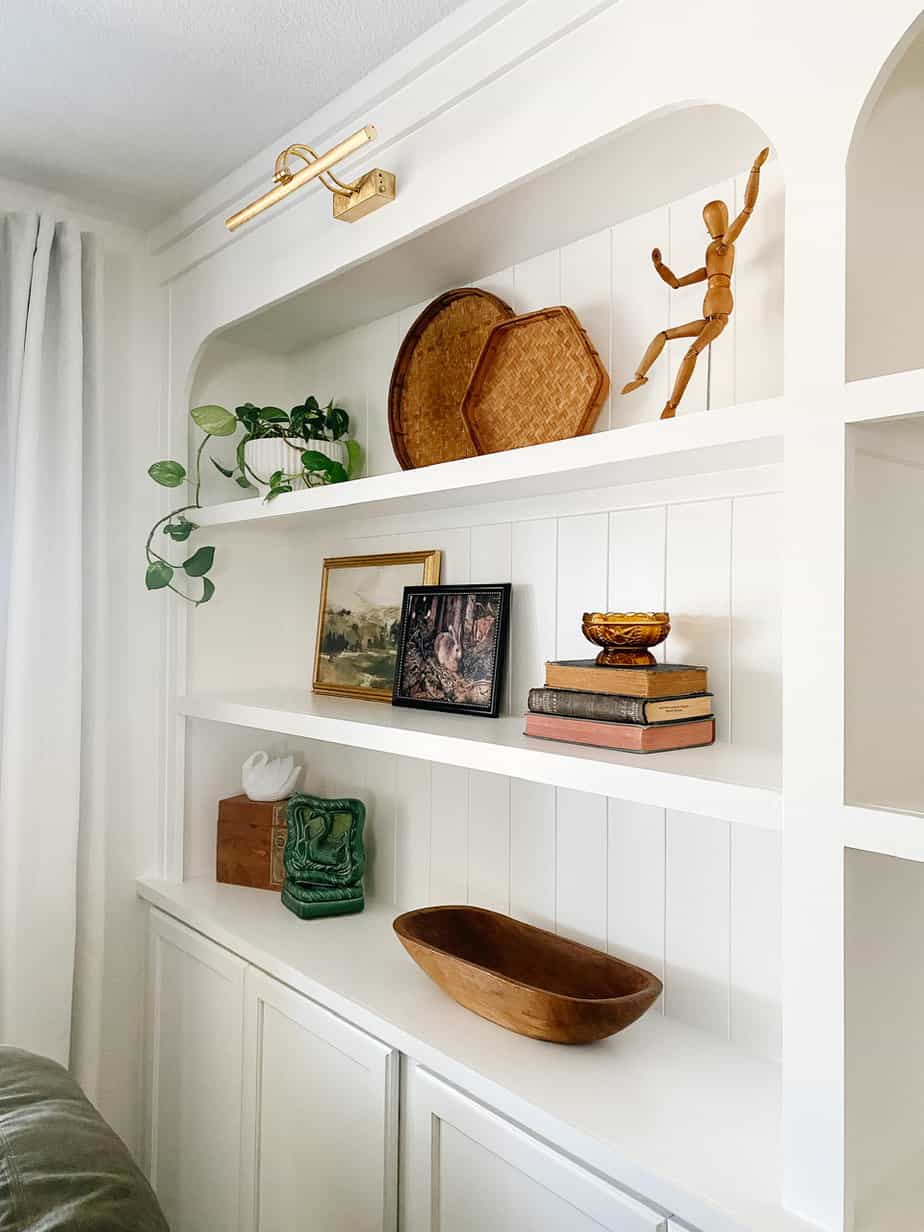
After caulking for what felt like 5 years (So. Much. Caulking.)….I finished up all the painting and hung the three rechargeable picture lights over each set of shelves. I used Benjamin Moore Advance Alkyd Enamel paint in the color Simply White, the same white I use on our walls.
Finally, it was time for my least favorite part…styling. I have a love/hate relationship with styling. I thought I had plenty of stuff lying around to decorate all these shelves, but I ended up needing way more! Having lots of tiny art was the key. I ended up DIYing some; I’ll save that for another post. Honestly, this part took me several days, but it finally fell into place.
FYI-See how that cord for that tiny lamp goes into the outlets in the cabinets? I used a spade bit to drill a hole in the very back corner through the countertop that was large enough for a plug to fit through. I also did this on the opposite side of the built-ins because I live for a tiny lamp. The holes are easily hidden by decor.
Okay, are you ready for the big reveal?
Drumroll……………….
TA-DAAAAA!
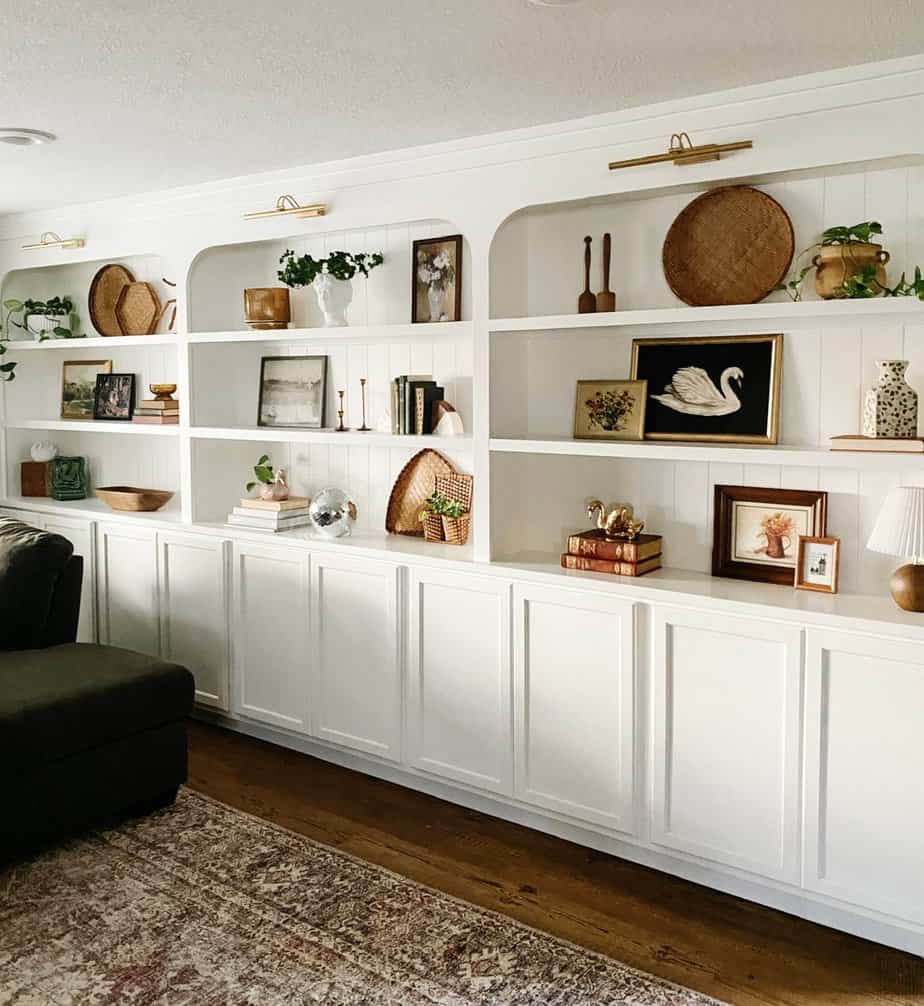
Looking back at all the struggles I had with this project, the unlevel floor, walls, and ceiling issues, you would never know now that everything has a coat of white paint. It all worked out in the end, thankfully.
This was definitely the biggest, most difficult, and (at times) most frustrating project that I’ve ever taken on and it turned out so much better than I could have imagined.
Well, I think I’ve covered just about everything I can think of. If you have any questions about this project, drop a comment below and I will do my best to answer!
For even more details on this project, head over to Instagram then click on the highlight labeled “Built-Ins”.
Budget Breakdown coming soon….


No Comments