
Ever wondered how to create a grid wall? Creating a grid wall is actually surprisingly simple. They really add some drama to a room, don’t they? So classy. No two are really the same because no two people’s walls are the same. Today, I’m sharing two grid walls that I’ve completed as well as all the steps on how to create your own!
Materials:
- MDF 1x3s (you could also use primed pine or raw wood 1x3s)
- Liquid Nails
- 18-gauge brad nails
- Caulk
- Paint
Tools:
- Miter saw or circular saw
- Nail gun
- Level or laser level
Step One: Determine the Layout
Anytime I create a grid wall, this is the calculator that I use and it is amazing. I seriously could not do one of these without it! You guys already know how I feel about math. It’s a lot like the board and batten calculator that I shared in the previous post. You just plug in the material and wall dimensions and it does the work for you! Here is the link:
Grid Accent Wall Calculator – Sawdust Sisters
The trick is when plugging in your dimensions, you want to try and get the height and width of each grid as close to the same as possible so it looks like a perfect square.
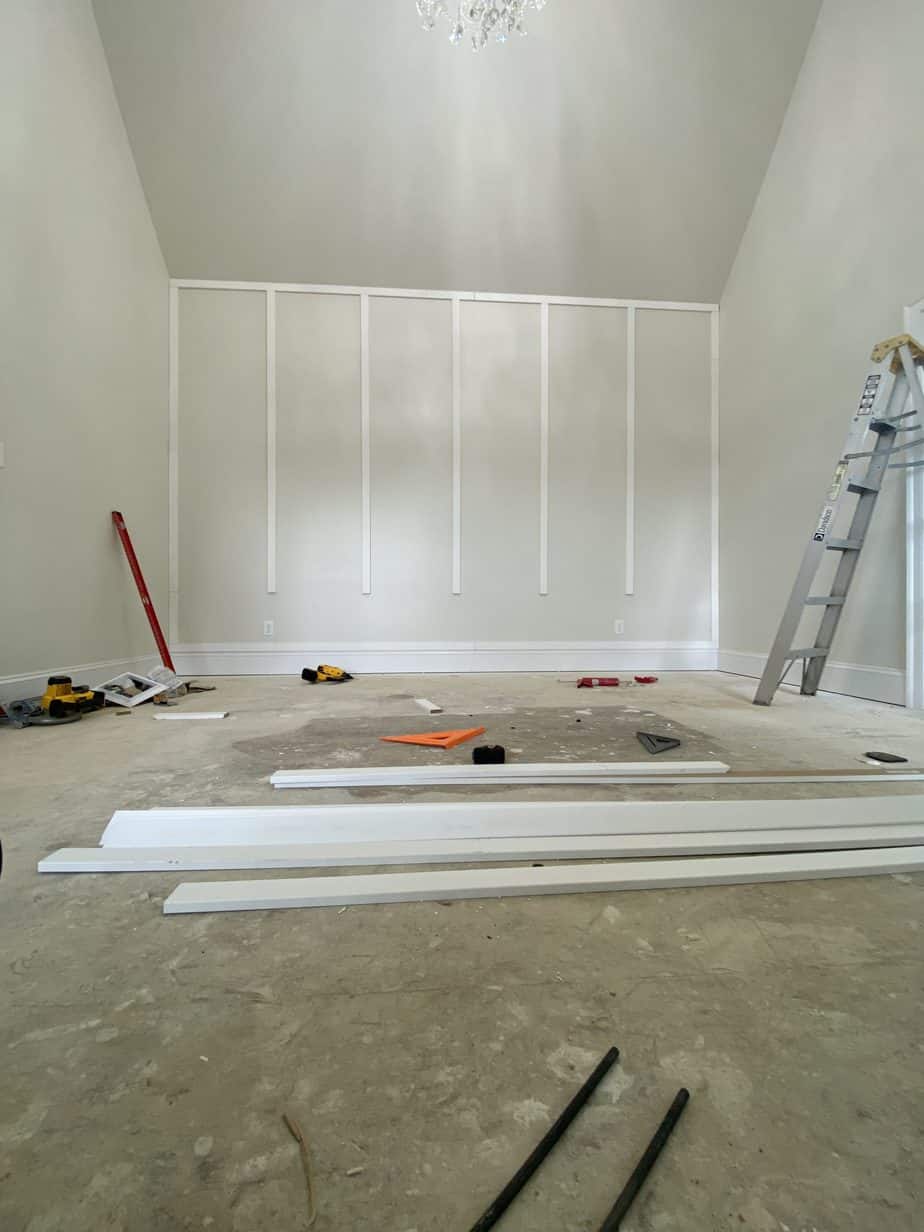
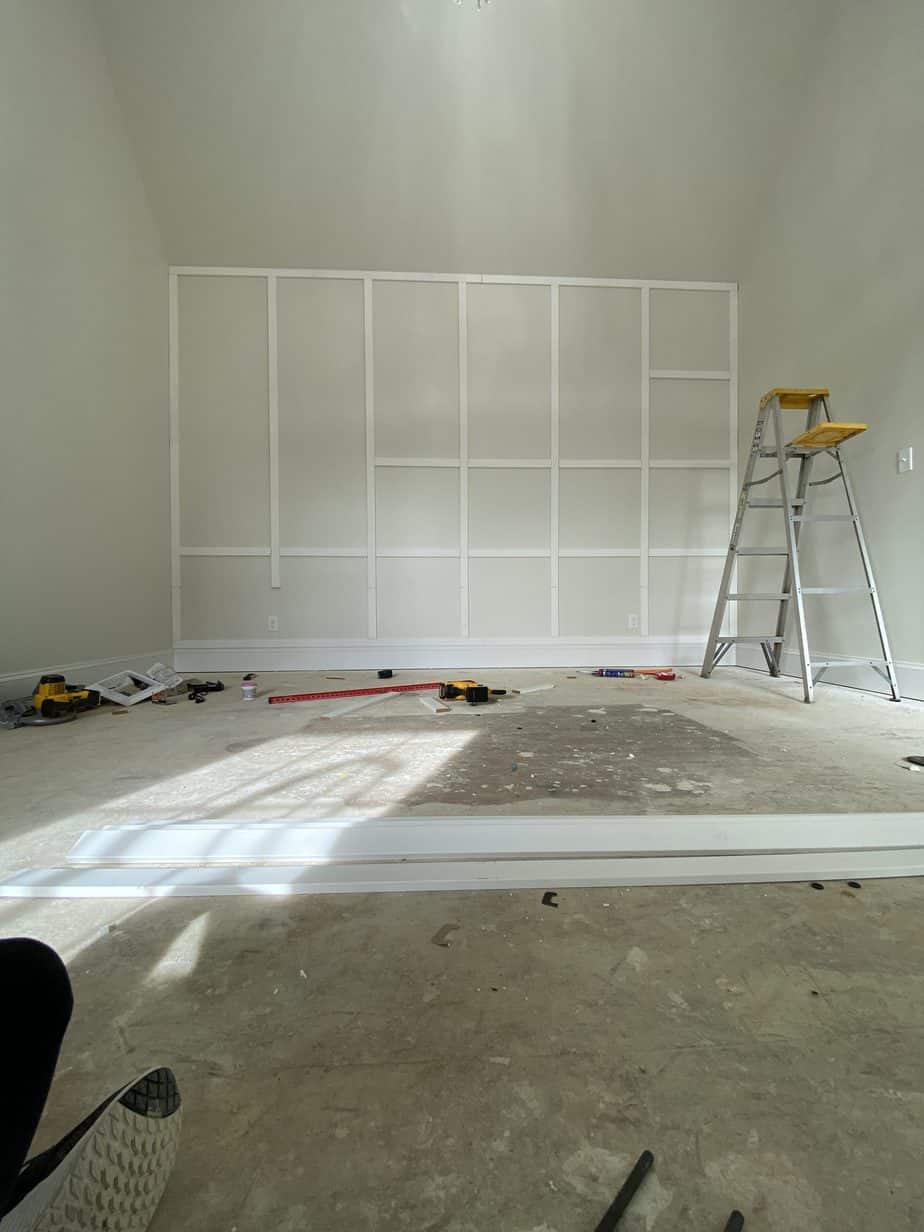
Step Two: Attach the Boards
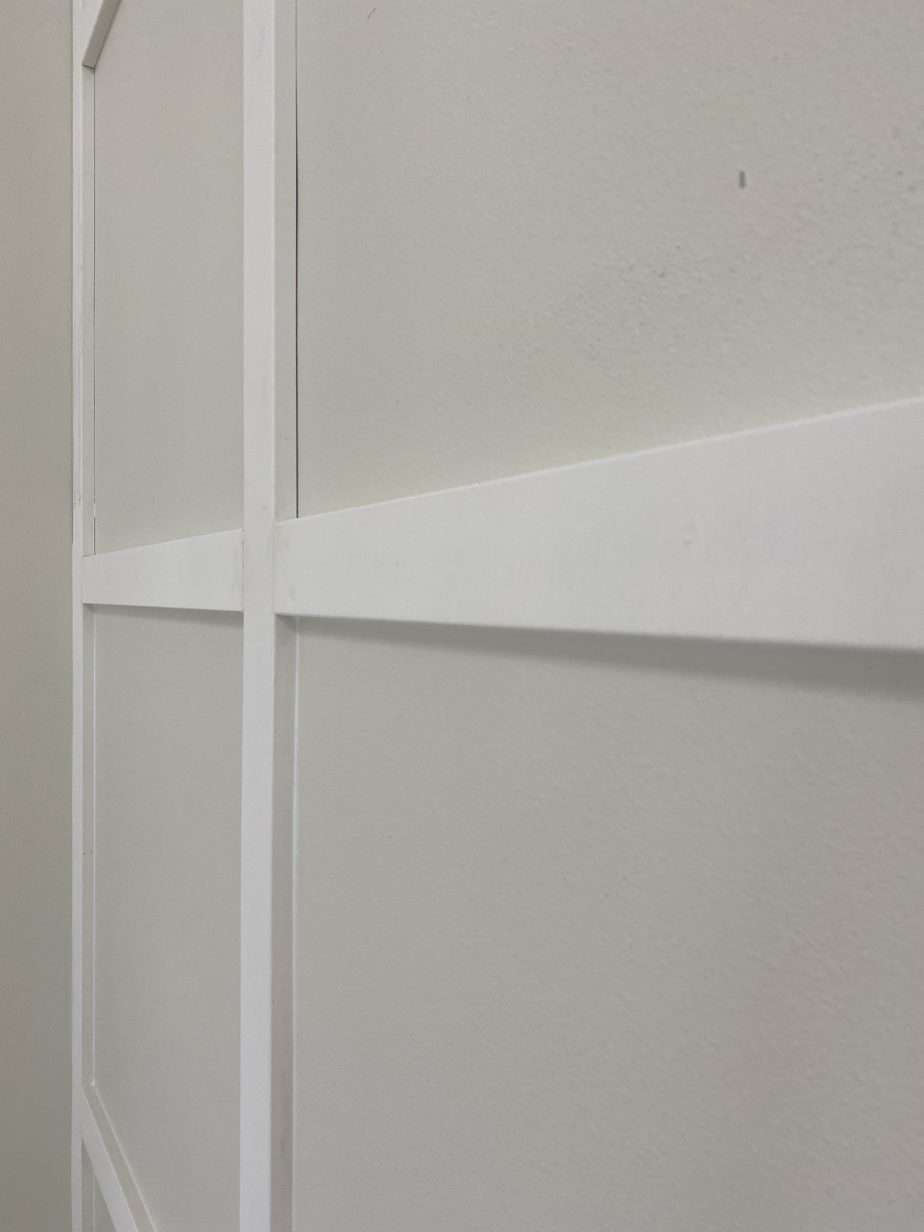
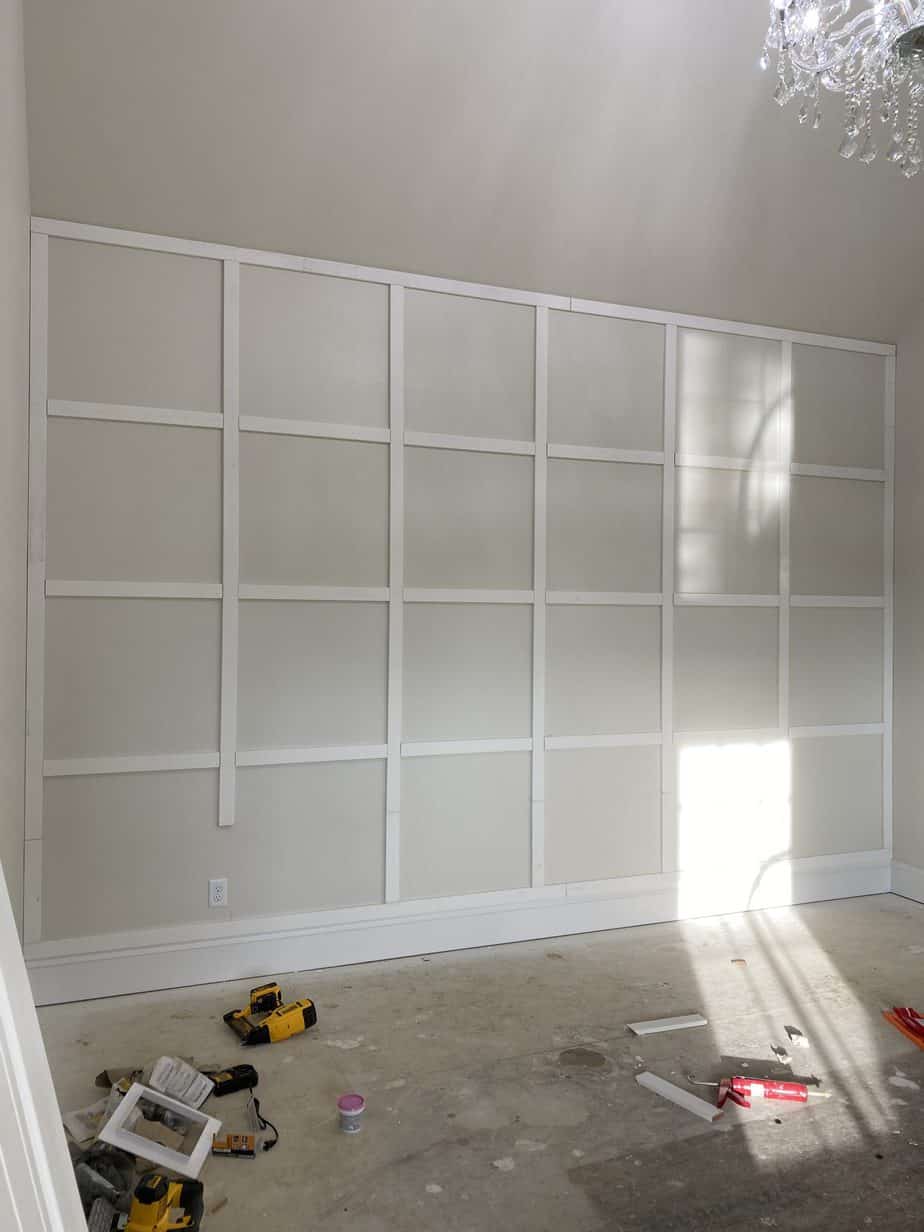
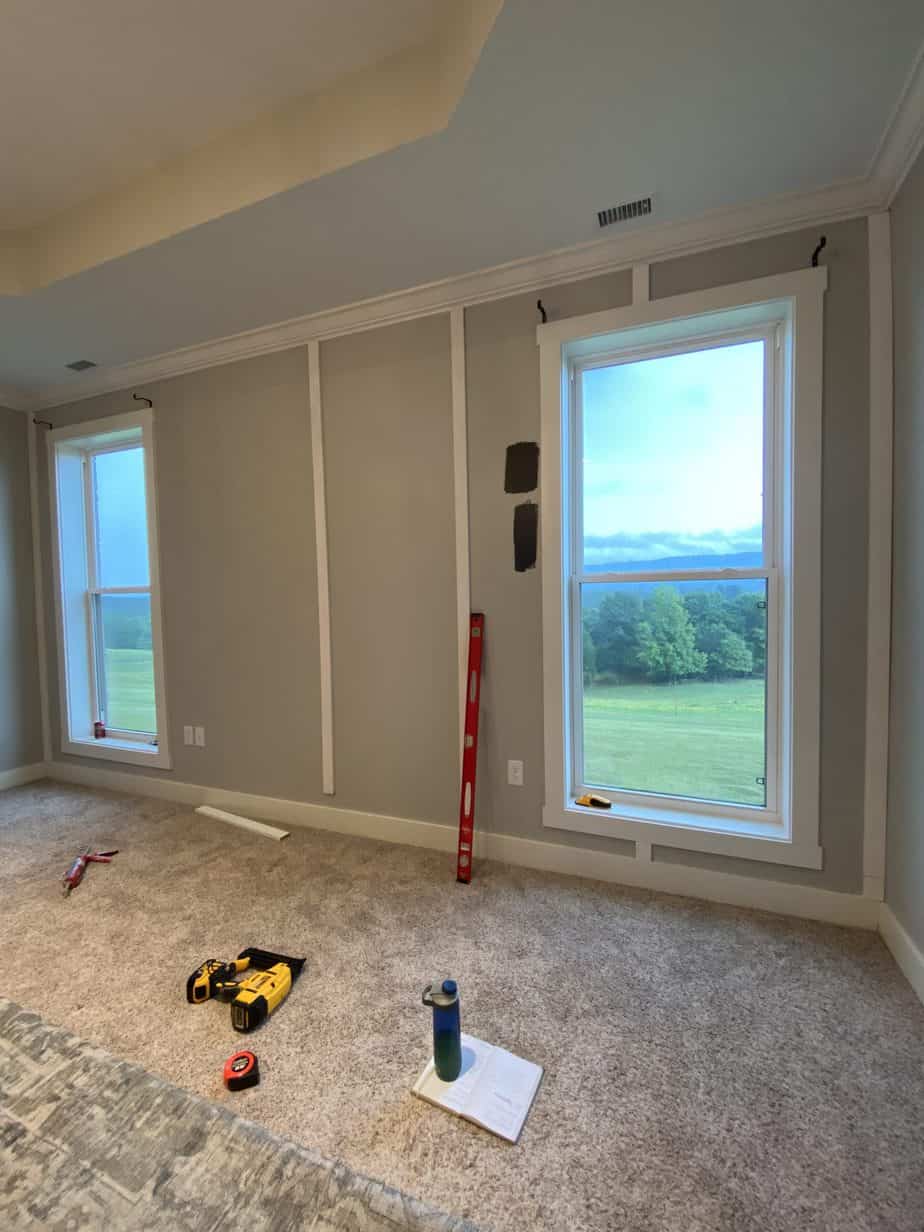
I always start with the vertical boards first. Use a laser level or a large regular level to make sure they’re straight. I also cut a horizontal spacer board ahead of time once I determine the dimensions to make sure they are all evenly spaced. I use a dab of Liquid Nails as well as regular nails to attach the boards. If you have a spot where two vertical boards meet, cut them at 45 degrees and it helps to hide the seam.
Once all your vertical boards are in, start cutting the horizontal pieces. You can cut boards two at a time with your miter saw to make the process go faster. Repeat the process above to attach and check for level as you go.
Step Three: Caulk & Paint
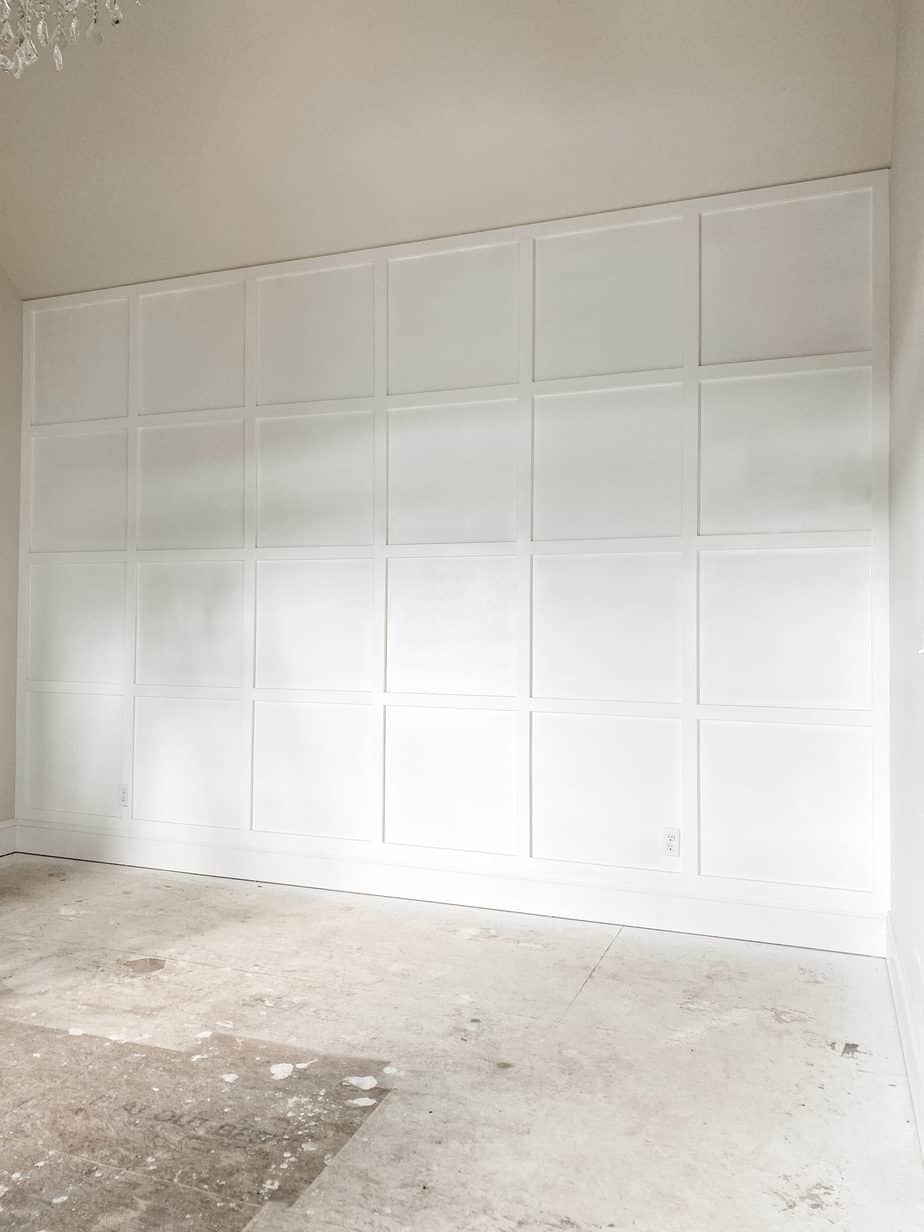
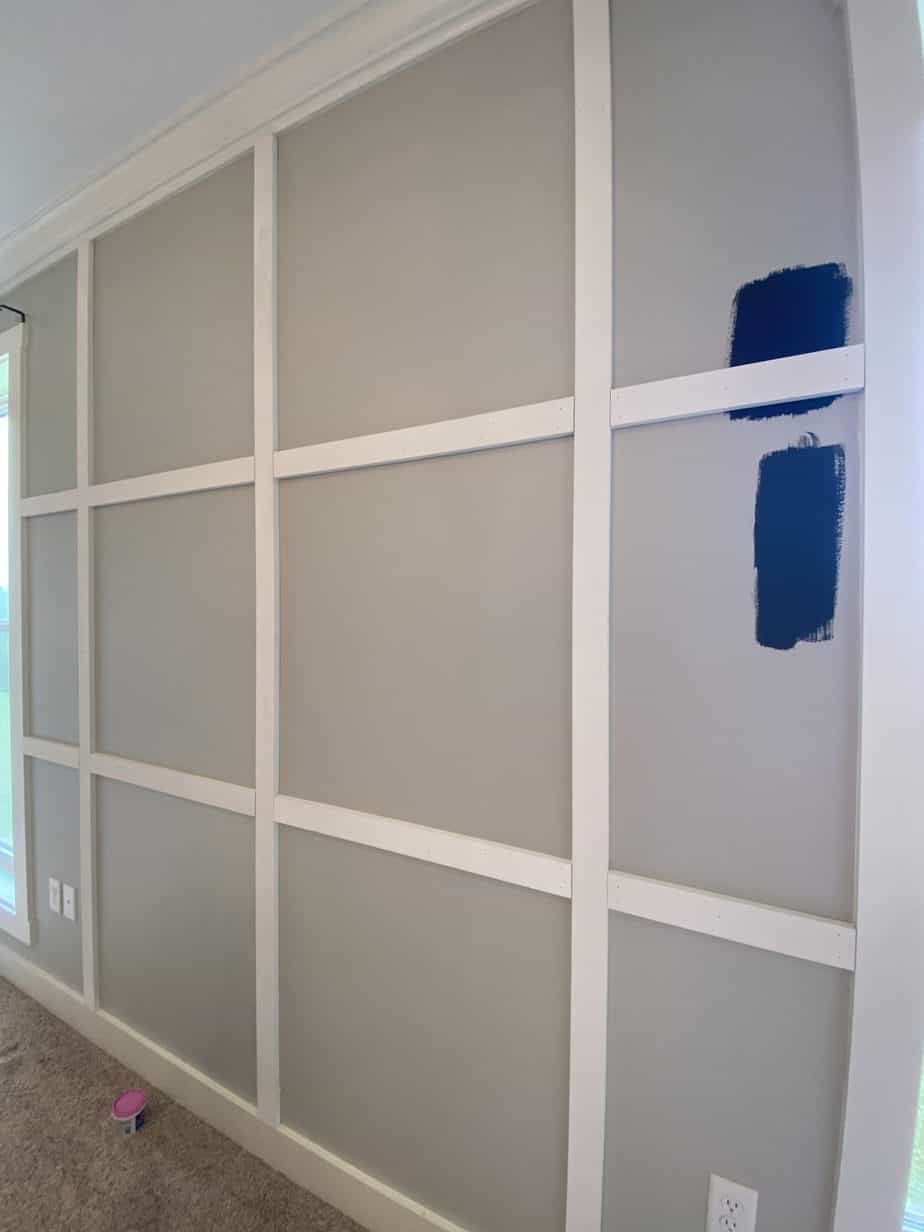
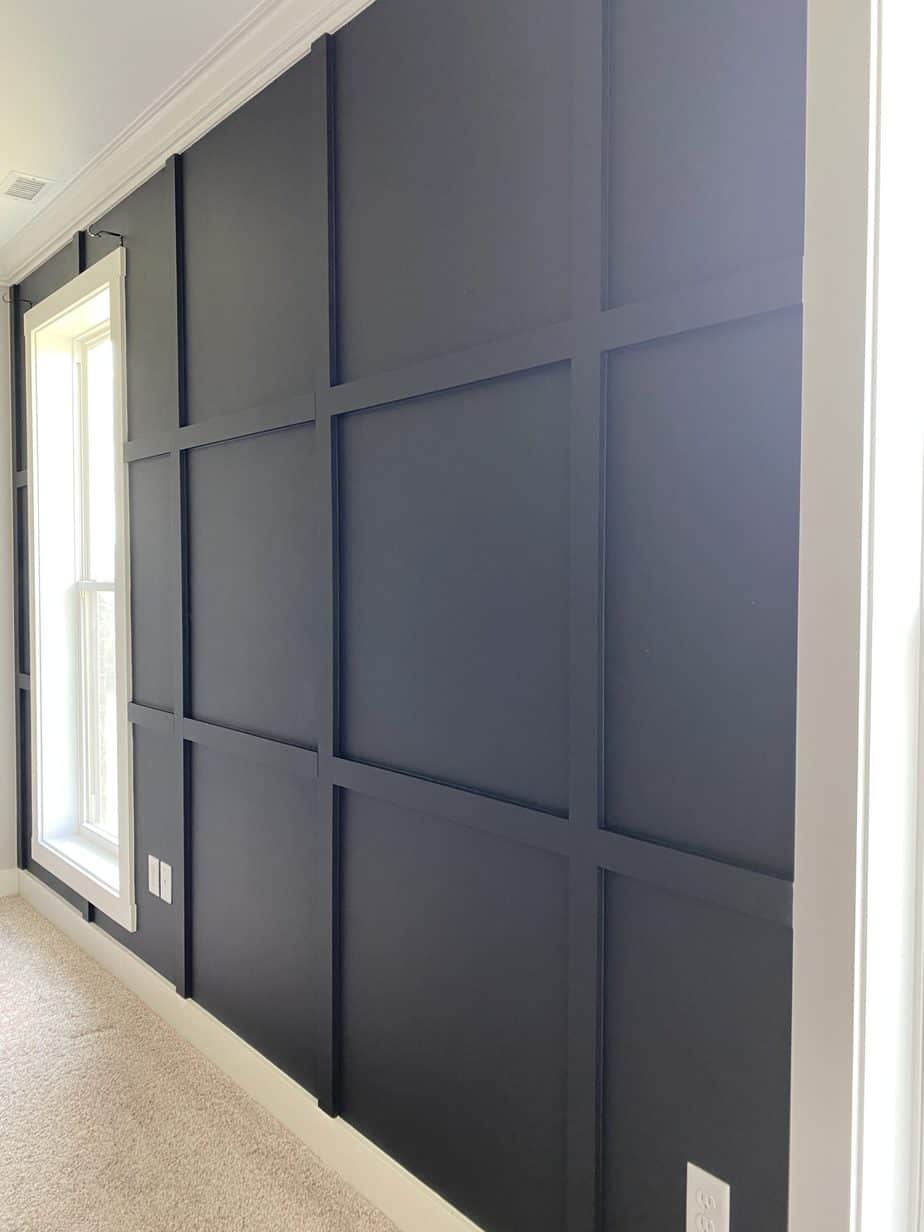
As tedious as it sounds, you should caulk every seam! I know, bad news if you hate to caulk. It really is all in the finish work here, though, especially if you plan on painting the wall a light color. Those seams will stick out like a sore thumb. Just look at the difference in the two grids pictured below. It’s night and day. Please, don’t skip this step!
Now it’s time to paint. If you use raw wood, you’ll want to prime first with a shellac or oil-based primer before you paint.
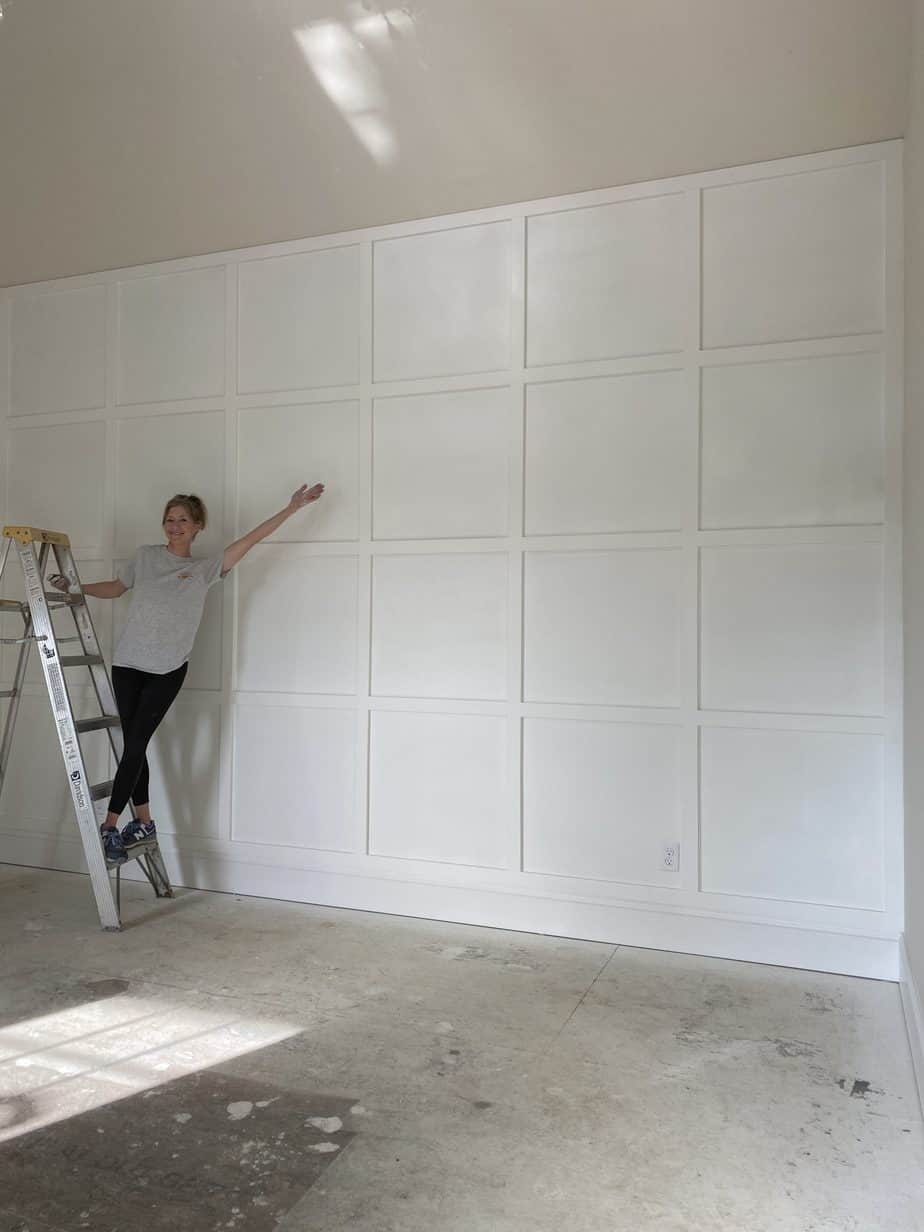
The grid wall below was the first one I had ever done. It was a massive wall with high ceilings. I was still able to knock it out in a couple of days. Carpet hadn’t been installed yet which was great because I was able to use the paint sprayer which made things go a lot faster. Paint color is Pure White by Sherwin-Williams.
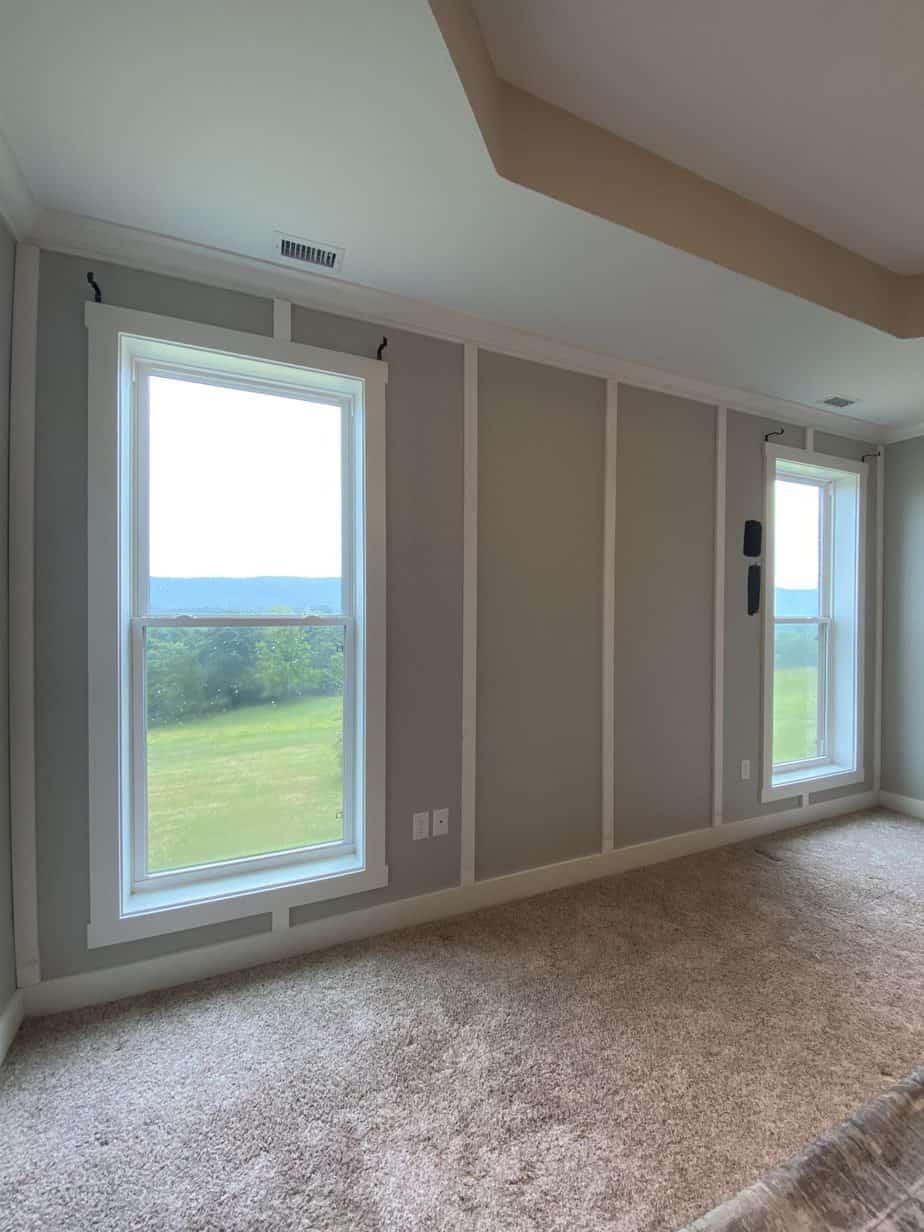
For the black grid wall, there were two large windows to work around which made the layout a little more tricky. This layout ended up not having as many grids. It only took ten boards to complete this wall! Super inexpensive. I wasn’t able to use the sprayer on this one but it only took a few days to complete. Paint color is Tricorn Black by Sherwin-Williams.


No Comments